November 2026 · Shop tips
Before You Pay for AC Compressor Replacement
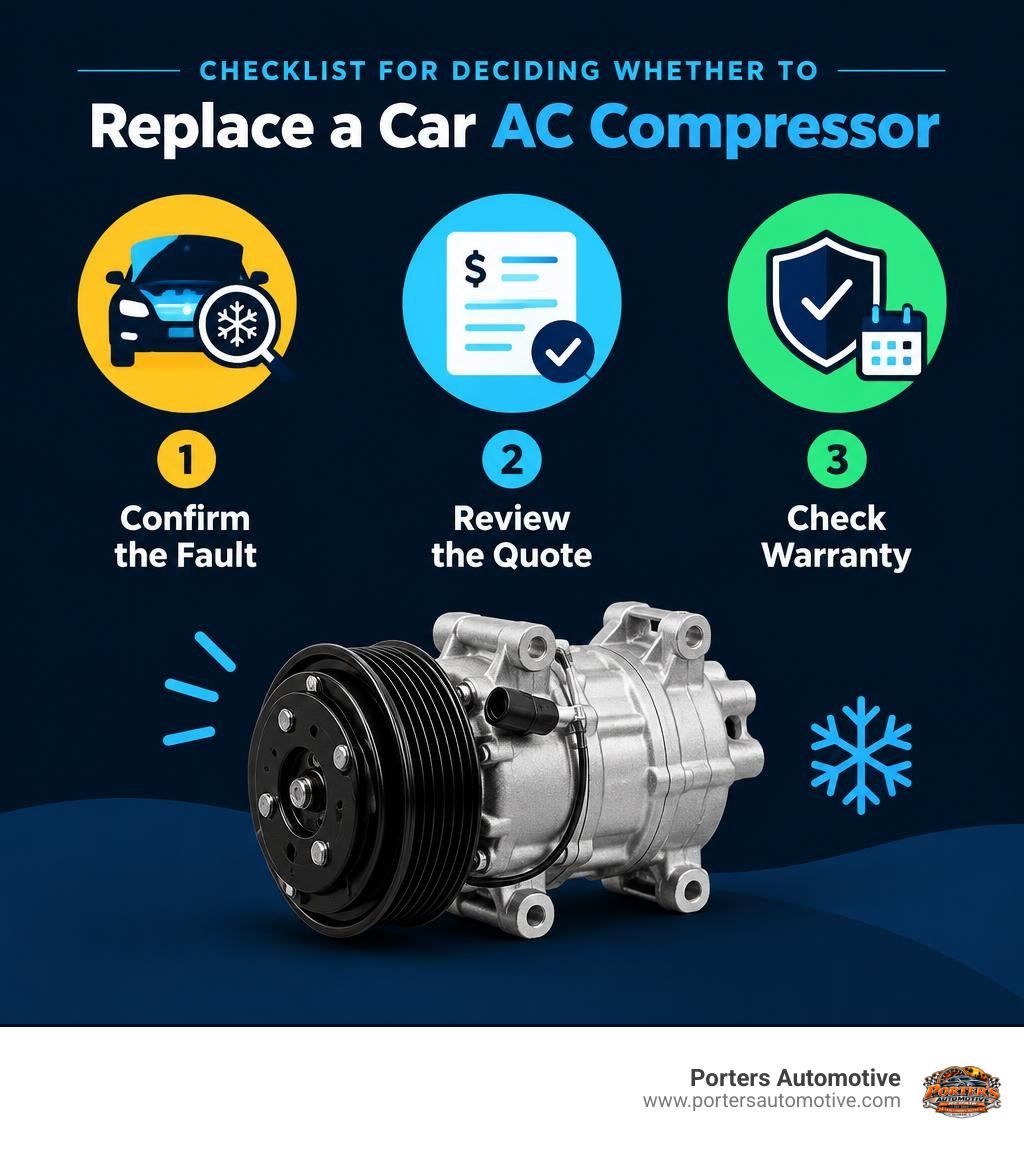
Don’t approve an AC compressor replacement based on warm air alone. A bad relay, failed clutch, or refrigerant leak can cause similar symptoms. Ask for a diagnosis that confirms the compressor has failed and an itemized quote that covers the needed parts, labor, and refrigerant service. Installed costs vary by vehicle; one automotive estimate puts the typical range at about $1,080 to $1,460.
I’m Heath Porter, owner of Porters Automotive in Tallahassee, and I’ve worked in automotive service since 2006. I’ll draw on that experience to help you decide when an AC compressor replacement is worth paying for and when the problem may have a simpler fix.
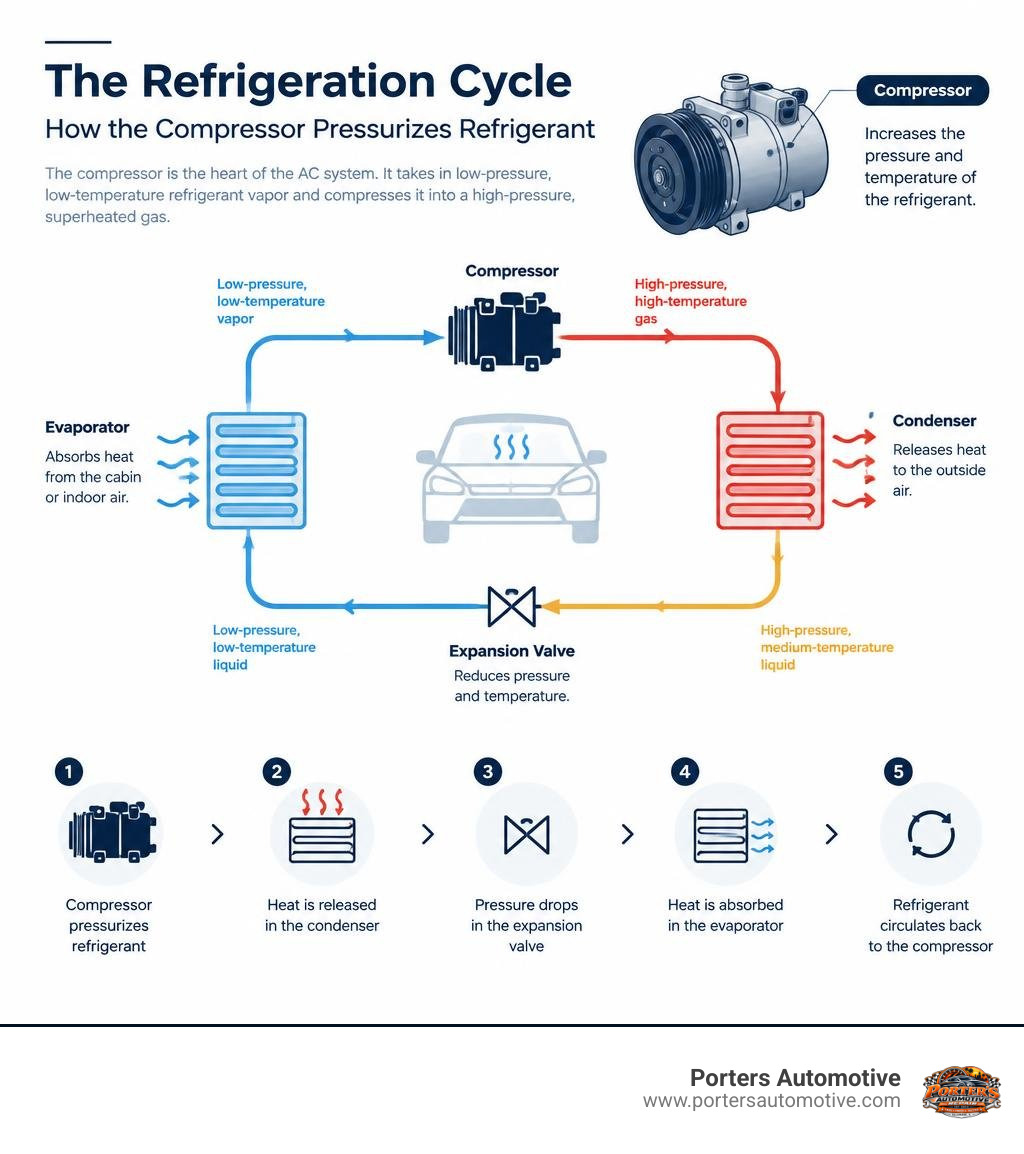
The refrigeration cycle depends on the compressor to act as the mechanical heart of the entire setup. Whether inside your vehicle’s engine bay or sitting in your backyard outdoor condenser unit, the compressor takes in low-pressure, low-temperature refrigerant vapor and compresses it into a high-pressure, superheated gas. This pressure change forces the refrigerant through the condenser coils, where it sheds heat into the outside atmosphere before flowing through an expansion valve or orifice tube, absorbing cabin or indoor heat inside the evaporator coil, and circulating back again.
When this central pump breaks down, heat exchange completely stops, leading to sudden cooling failure and potentially hefty repair estimates. Knowing how to evaluate those estimates ensures you never pay for major mechanical work when a minor fix would solve the problem.
Telltale Signs of a Failing AC Compressor
A bad compressor does not always quit quietly overnight. In most cases, it exhibits distinct physical, acoustic, and thermal warnings before giving up completely.
Here are the warning signs we look for during an inspection:
- Warm Cabin or Indoor Air: If the blower fan runs normally but the air coming out of your vents remains lukewarm, the refrigerant is likely not circulating under proper operating pressure.
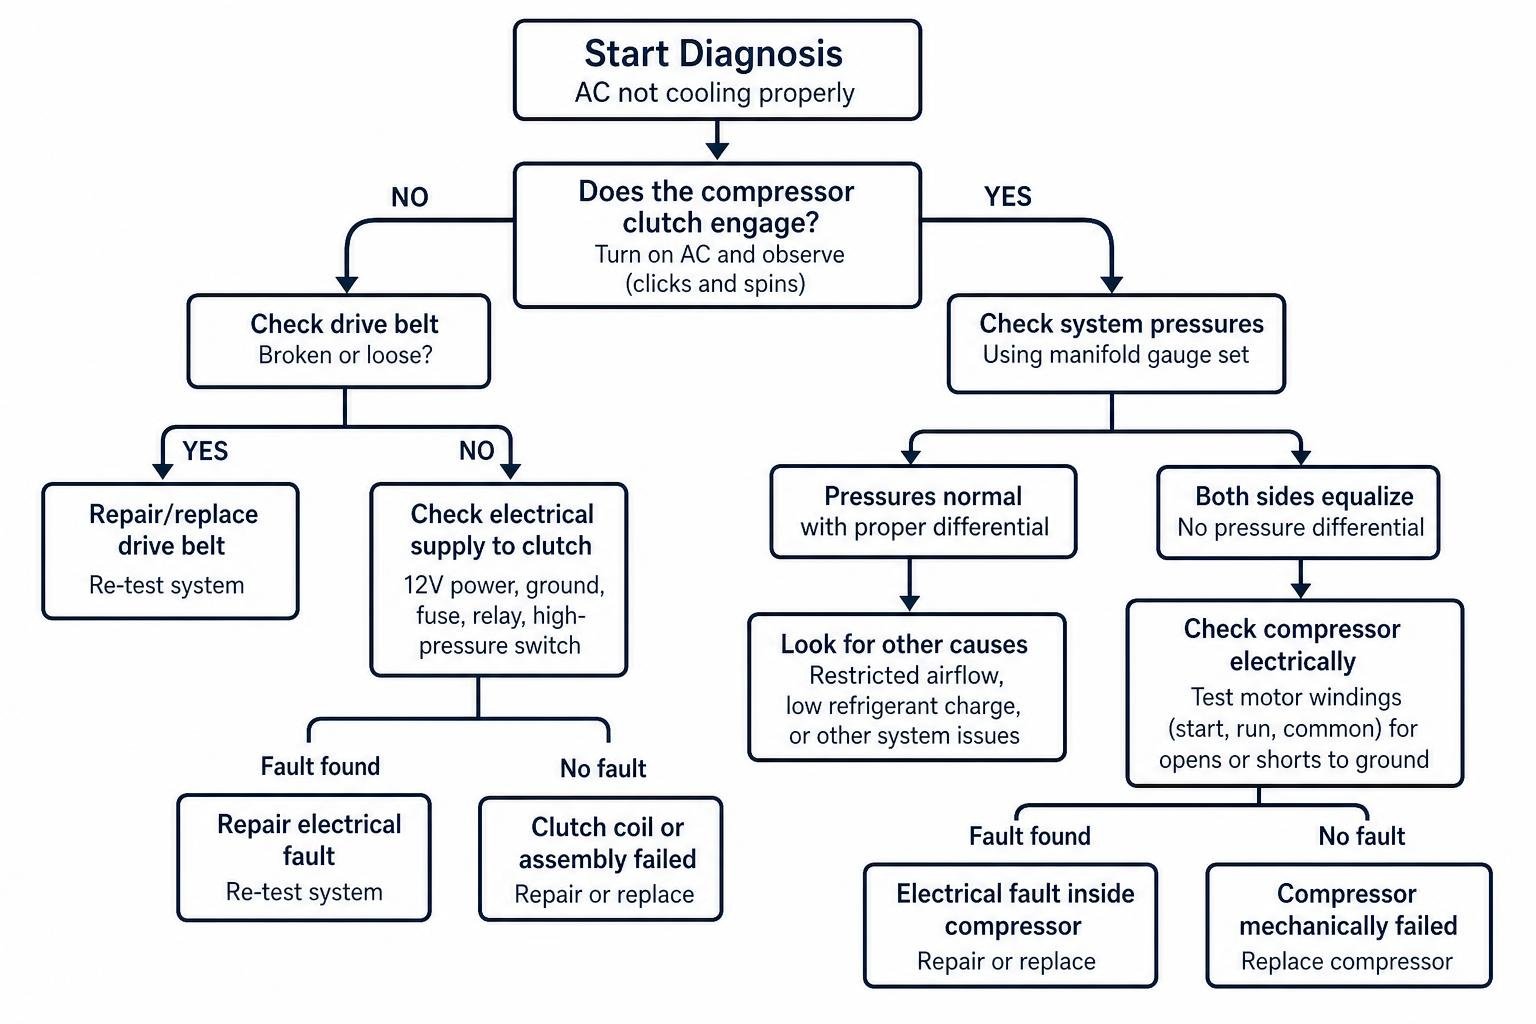
- A Clutch That Refuses to Engage: On automotive units, the compressor is driven by your engine's serpentine belt via an electromagnetic clutch. When you turn on the AC, you should see and hear the clutch plate click and spin alongside the pulley. If the pulley spins freely while the front hub remains stationary, the clutch coil, relay, or internal assembly has failed.
- Loud Squealing or Screeching: A loud, high-pitched screech right after turning on your AC often points to severe clutch slippage or an internal bearing that is locking up, causing the drive belt to drag across a frozen pulley.
- Grinding and Rattling Mechanical Noises: Worn internal pistons, broken scroll plates, or dry bearings produce a distinct metallic chatter or grinding rattle as the compressor operates under load.
- Visible Refrigerant and Oil Leaks: Refrigerant carries specialized lubricating oil throughout the lines. If you see greasy, dark residue gathering around the compressor belly seams, shaft seal, or hose manifold connections, the system's hermetic seal has ruptured.
Before assuming the worst, it always pays to check these basics before repairing your car's AC to rule out simple blown fuses or clogged cabin filters.
How to Confirm You Truly Need an AC Compressor Replacement
Because the compressor represents one of the most substantial repair investments on any vehicle or residential cooling system, guessing is never an acceptable diagnostic strategy. A professional technician uses precision tools to isolate mechanical failure from external electrical and control issues.
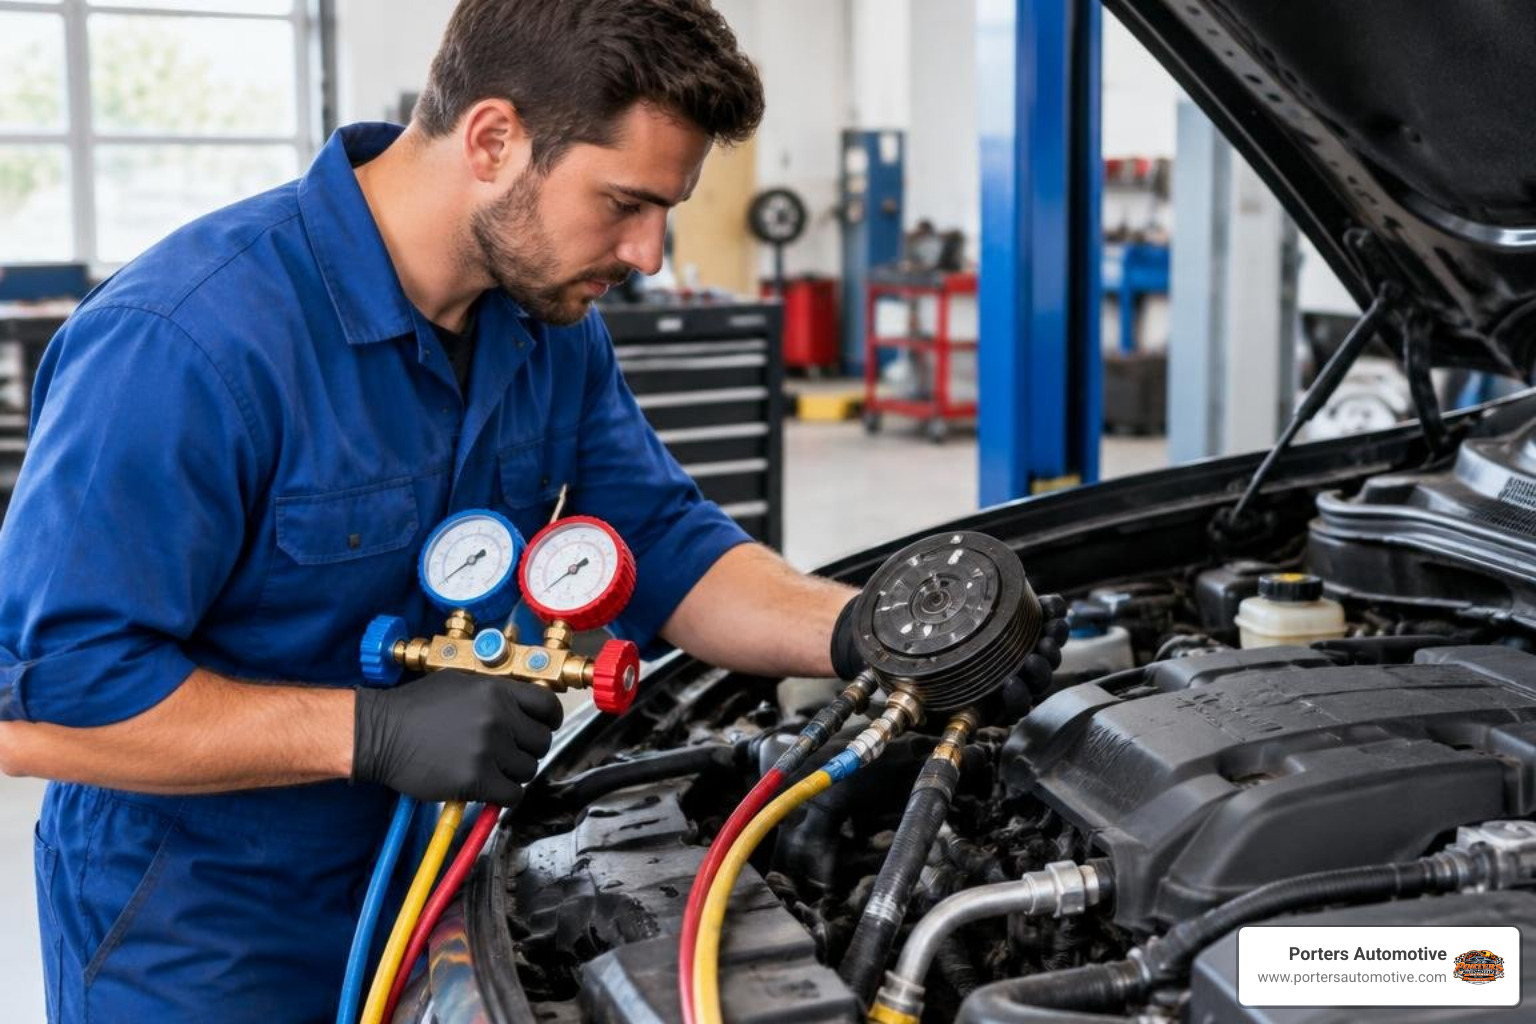
First, technicians attach a calibrated manifold gauge set to read high-side and low-side pressures. If both sides equalize and refuse to show a pressure differential when the compressor is energized, the pump is either mechanically compromised internally or not being driven.
Next comes electrical verification. In automotive setups, technicians check for 12-volt power and ground at the compressor harness to ensure a blown fuse, faulty high-pressure cutout switch, or defective relay is not mimicking a dead pump. In residential central air units, a multimeter is used to test the dual-run capacitor and contactor points. A weak capacitor—a repair costing $150 to $350—is frequently misdiagnosed by untrained eyes as a failed $2,000 compressor.
Technicians also test the electrical resistance across the compressor motor windings (measuring start, run, and common terminals) to check for open circuits or internal shorts to ground. That is why smart motorists always insist on automotive air conditioning repair that finds the cause before authorizing major part replacements.
What Influences the Total Cost of an AC Compressor Replacement?
The overall financial commitment for replacing a compressor varies significantly depending on whether you are repairing a daily commuter vehicle or a multi-ton residential central split system.
| System Category | Typical Part Cost | Typical Labor Range | Total Average Installed Cost | Standard Job Time |
|---|---|---|---|---|
| Automotive AC System | $200 – $800 (Car/SUV) | $135 – $360 | $750 – $1,460+ | 2 – 4 Hours |
| Residential 1.5–2.0 Ton | $445 – $925 | $450 – $700 | $895 – $1,550 | 3 – 5 Hours |
| Residential 3.0 Ton | $595 – $1,065 | $600 – $900 | $1,205 – $1,905 | 3 – 5 Hours |
| Residential 4.0–5.0 Ton | $800 – $2,000 | $700 – $1,500 | $1,800 – $3,500+ | 4 – 6 Hours |
Several critical factors drive where your final invoice lands within these ranges:
- Labor Intensity and Hourly Rates: Labor commonly accounts for 40% to 60% of the total bill. Evacuating refrigerant, removing structural brackets, unbolting tight engine mounts or brazing copper line sets, pulling deep vacuums, and recharging all demand dedicated shop time.
- Refrigerant Types and Capacities: The type of refrigerant required dictates a large share of material fees. While standard automotive R134a remains relatively economical, newer vehicles using mildly flammable R1234yf face higher fluid costs. In home systems, older R22 systems can run $90 to $150 per pound due to phase-out restrictions, while R410A generally costs $50 to $80 per pound.
- System Capacity and Complexity: A simple single-stage compressor is far less expensive than a modern variable-speed inverter compressor, which requires complex electronic controls.
- Warranty Coverage: If your residential system or auto part remains under an active manufacturer parts warranty, your out-of-pocket expense may only involve labor and refrigerant recovery fees ($600 to $1,200) rather than full part pricing.
Understanding what goes into your repair bill helps eliminate surprises; take time to review what AC servicing charges you should expect before dropping off your vehicle.
Essential Ancillary Parts to Replace Alongside the Compressor
Replacing only the compressor without addressing connected wear components is a recipe for premature failure. When an old compressor degrades, internal friction sheds microscopic metal shavings, charred oil, and desiccant dust throughout the sealed tubing.
To safeguard your investment and maintain warranty protection, always replace these complementary components:
- Receiver-Drier or Accumulator: This canister captures trace moisture and filters debris. Once exposed to ambient air or contaminated by compressor wear, its internal desiccant pack becomes saturated and useless.
- Thermal Expansion Valve (TXV) or Fixed Orifice Tube: These precision metering devices regulate refrigerant flow into the evaporator. Fine particulate matter from a failing pump can easily plug their tiny openings.
- System O-Rings and Seals: High-grade HNBR rubber O-rings must be lubricated with clean oil and replaced at every disconnected joint to prevent slow pressure leaks.
- Compressor Lubricant (PAG or POE Oil): Fresh, moisture-free oil balanced to the exact fluid capacity specified by the manufacturer is vital for internal lubrication.
Skipping these supplementary parts exposes your brand-new compressor to old metal contamination, virtually guaranteeing a repeat breakdown. Knowing the cost breakdown of major AC components helps put these vital secondary parts into perspective.
Should You Replace the Compressor or the Entire AC System?
When dealing with a major cooling failure, homeowners and motorists often ask whether swapping out just the compressor makes financial sense or if replacing the broader system is the smarter move.
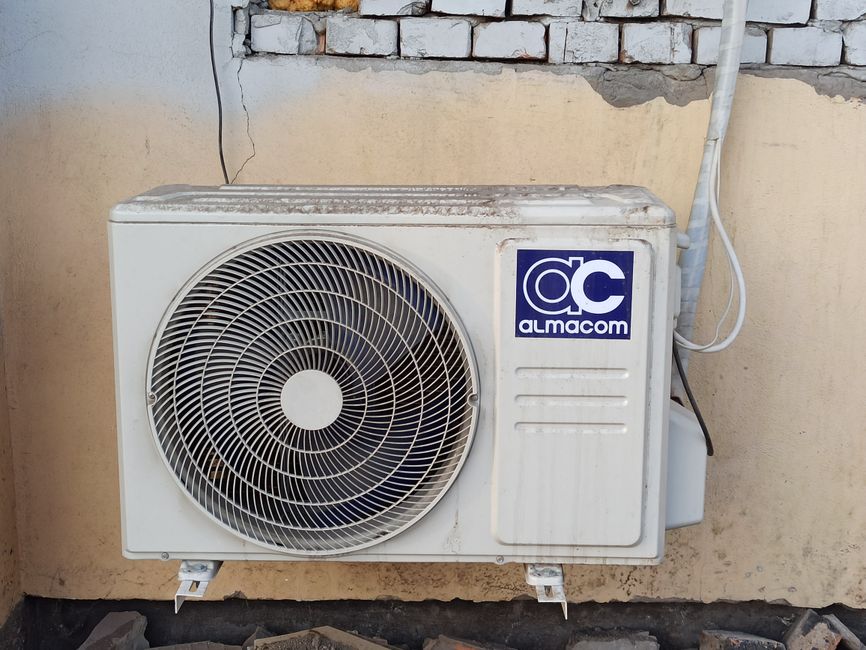
A practical standard to apply is the 50 Percent Rule. If the comprehensive estimate for a standalone compressor repair exceeds 50% of the total cost of a completely new system installation—and your existing equipment is approaching the latter half of its operational life expectancy—investing in a full system replacement is generally the wiser long-term financial decision.
Consider these key decision points:
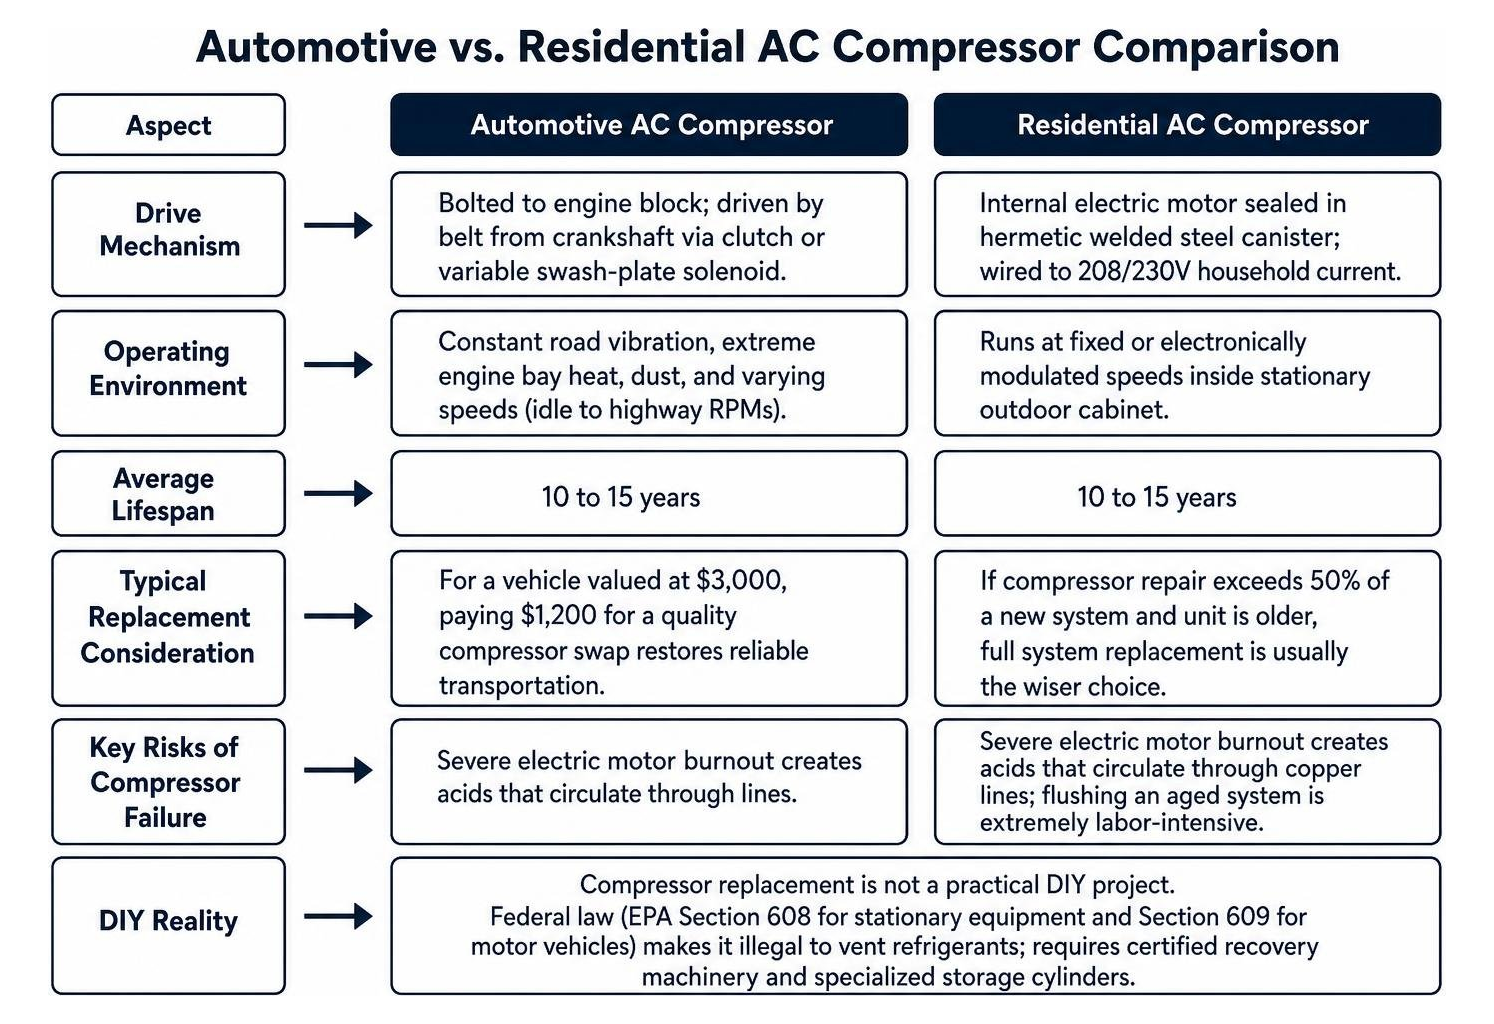
- Equipment Age and Life Expectancy: AC compressors and outdoor heat pumps generally have an average operating lifespan of 10 to 15 years. If your residential unit is 12 years old, spending $2,500 to replace the compressor leaves you with an aging fan motor, corroded coils, and outdated duct compatibility that could fail next season.
- Severe Compressor Burnout: When an electric motor winding burns out internally, it generates hydrofluoric and hydrochloric acids that circulate through the copper lines. Completely flushing this acid out of an aged system is extremely labor-intensive; any leftover residue will rapidly eat through a new compressor.
- Energy Efficiency Standards: Modern residential units operating under current SEER2 efficiency standards consume substantially less electricity than units built a decade ago. Upgrading an entire home system (typically ranging between $5,000 and $12,000+) delivers ongoing utility savings that a standalone compressor swap cannot provide.
- Vehicle Valuation: For an automobile valued at $3,000, paying $1,200 for a quality compressor swap restores reliable daily transportation at a fraction of the cost of purchasing a replacement vehicle.
For home systems, reviewing a comprehensive repair cost analysis provides helpful baseline figures for balancing major component repairs against complete system overhauls.
Automotive vs. Home Systems: Key Differences and DIY Realities
While automotive and residential cooling systems share the same foundational thermodynamics, their mechanical operation and repair environments involve distinct engineering:
- Drive Mechanism: Car compressors are bolted directly to the vehicle engine block and driven mechanically by a belt connected to the crankshaft, controlled via an electromagnetic clutch or variable swash-plate solenoid. Residential compressors house an internal electric motor sealed inside a hermetic welded steel canister wired directly to high-voltage household current (208/230V).
- Vibration and Harsh Environments: Automotive units must withstand constant road vibration, extreme engine bay heat, dust, and varying operating speeds between idle and highway RPMs. Home units run at fixed or electronically modulated speeds inside stationary outdoor cabinets.
The DIY Question
Can you handle this repair in your home garage? In almost all scenarios, compressor replacement is not a practical DIY project.
Under United States federal law (EPA Section 608 for stationary equipment and Section 609 for motor vehicles), it is illegal to intentionally vent regulated refrigerants into the atmosphere. Safely capturing existing gas requires dedicated, certified recovery machinery and specialized storage cylinders.
Furthermore, pulling a proper vacuum requires an industrial two-stage vacuum pump and digital micron gauges. If you lack the specialized tools, professional recovery gear, and brazing or mechanical experience, it is always best to leave this job to a certified professional. Learn how to choose auto air conditioning repair near you to ensure your service provider has the necessary licensing, equipment, and experience.
The Step-by-Step AC Compressor Replacement Process
Whether working on a vehicle in our shop or watching an HVAC technician service a home unit, a professional replacement follows a strict technical sequence:
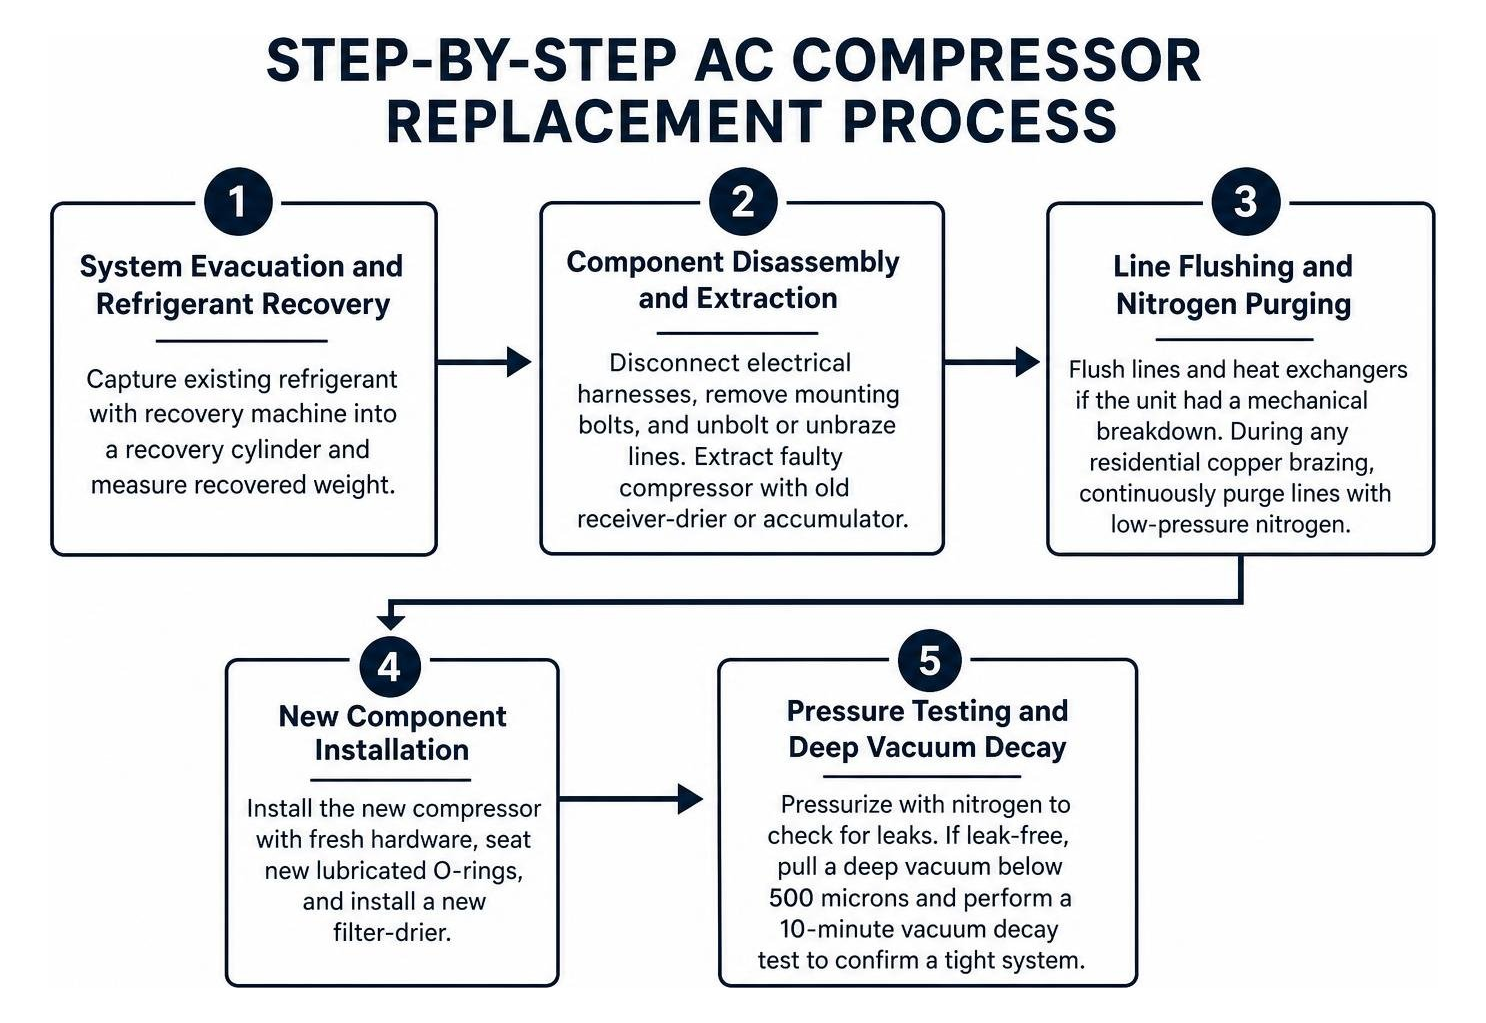
- System Evacuation and Refrigerant Recovery: The technician connects an EPA-certified recovery machine to capture existing refrigerant into a designated recovery cylinder, measuring recovered weight to detect historical undercharging.
- Component Disassembly and Extraction: Electrical harnesses are disconnected, mounting bolts removed, and lines unbolted or unbrazed. The faulty compressor is extracted alongside the old receiver-drier or accumulator.
- Line Flushing and Nitrogen Purging: If the old unit suffered mechanical breakdown, lines and heat exchangers are flushed. During any residential copper brazing, low-pressure nitrogen is continuously purged through the lines to prevent internal black oxide scale buildup.
- New Component Installation: The new compressor is secured with fresh hardware, new lubricated O-rings are seated, and a new filter-drier is installed.
- Pressure Testing and Deep Vacuum Decay: The closed system is pressurized with nitrogen to test for microscopic assembly leaks. Once leak-free, a high-capacity vacuum pump pulls the system down below 500 microns to boil away atmospheric moisture. A 10-minute vacuum decay test confirms the system holds tight.
- Recharging by Weight and Final Commissioning: The system is charged with virgin refrigerant measured to exact manufacturer weight specifications using digital scales. The technician starts the system, letting pressures stabilize for at least 15 minutes while measuring superheat, subcooling, temperature drop across the vents, and operating electrical amperage.
Frequently Asked Questions About AC Compressors
How long does an AC compressor typically last?
An automotive or residential AC compressor typically lasts between 10 and 15 years (or roughly 60,000 to 100,000+ miles on a vehicle) when given proper maintenance. Factors that shorten lifespan include operating with low refrigerant, restricted airflow from dirty air filters or packed condenser fins, excessive moisture inside the lines, and failing cooling fans that cause high operating pressures.
Does a new compressor improve overall system efficiency?
A replacement compressor will restore your cooling performance back to its original baseline design specifications. However, simply installing a new compressor into an older residential central unit will not miraculously boost an older 10 SEER setup into a high-efficiency 16 SEER2 system. Efficiency ratings depend on the engineering and surface area of both the indoor evaporator coil and outdoor condenser coil working together.
Is it safe to drive or run the AC with a failing compressor?
If the compressor failure is strictly confined to an open electrical coil or failed internal seal, running the blower without cooling is generally harmless. However, if the compressor's internal bearings are grinding, it is unsafe to continue driving the vehicle. A seized internal bearing can cause the external pulley to lock up entirely, instantly snapping your vehicle’s serpentine belt. On most modern engines, losing that belt immediately disables the alternator and water pump, resulting in rapid engine overheating and dangerous power steering loss. In home units, a locked rotor will repeatedly trip high-voltage circuit breakers and risk damaging supply wiring.
Conclusion
Facing an unexpected cooling failure is never pleasant, but you do not have to navigate major mechanical estimates blindly. By verifying the diagnosis, testing supporting electrical parts like relays and capacitors, and replacing necessary ancillary filters alongside fresh lubricant, you ensure your money is spent wisely.
Whether you need a second opinion on a repair quote or require dependable diagnostic testing for your vehicle's air conditioning system across Tallahassee, Quincy, or Bradfordville, FL, our certified team is here to help. Reach out to Heath Porter and the experienced crew at Porters Automotive today to schedule expert automotive AC diagnostic and repair services and keep your vehicle blowing ice-cold all year long.