November 2026 · Shop tips
Find the Right RV Battery Replacement Before You Buy

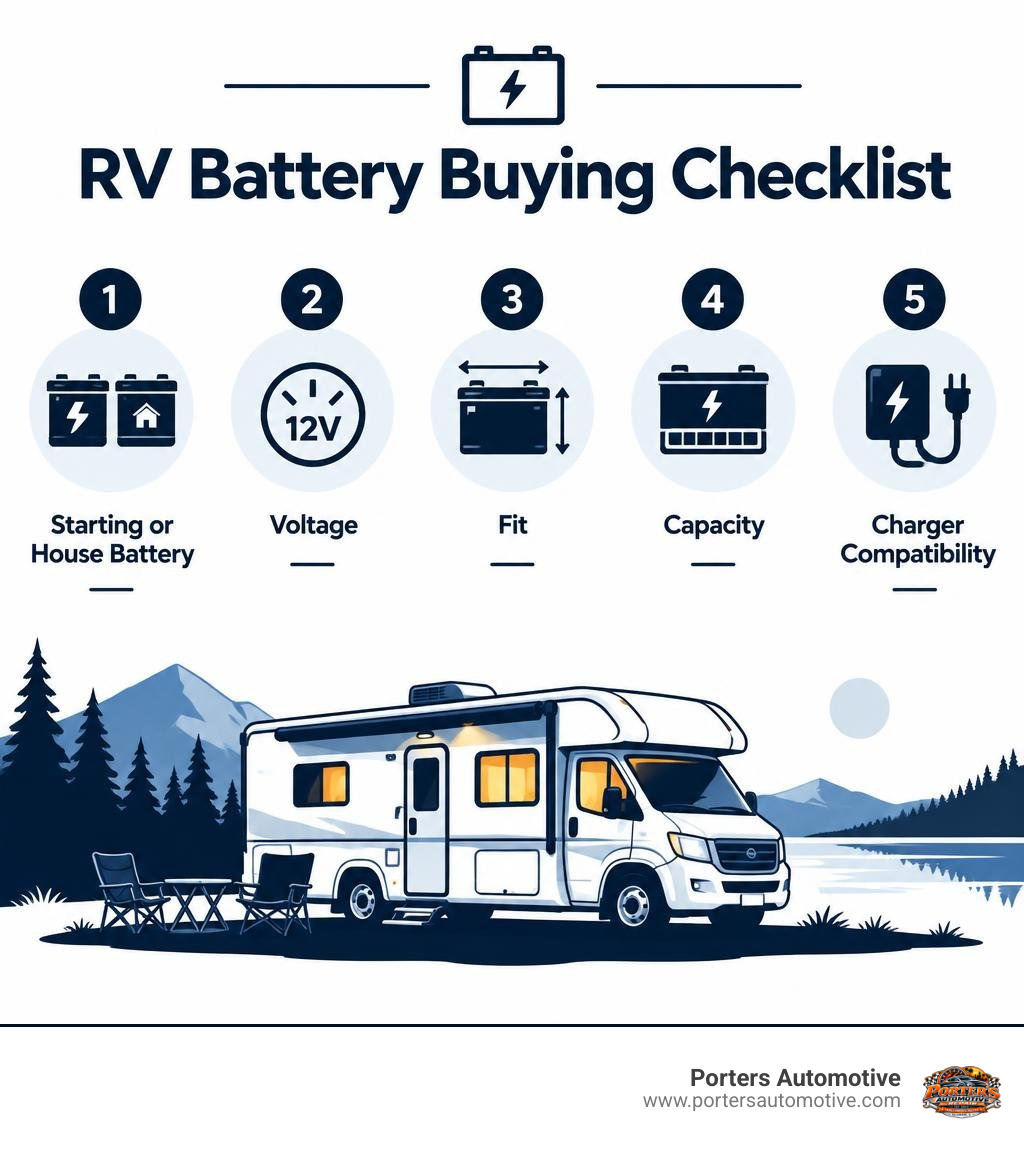
For battery replacement for RVs, first check which battery has failed. The starting battery powers the engine; a deep-cycle house battery powers lights and other living-area equipment. Buy a replacement that matches your RV's voltage, battery compartment, and power needs. A basic 12-volt deep-cycle house battery typically costs $150–$400. If you want lithium for longer off-grid trips, check your charging system before buying; the battery may fit, but your charger settings may need to change.
I'm Heath Porter, owner of Porters Automotive, and I've worked in automotive service since 2006. I bring that same practical approach to battery replacement for RVs: identify the job, check the fit, and test the system before spending money.
Choosing the Best Chemistry for Battery Replacement for RVs
Selecting the right chemistry is the most critical decision when planning an upgrade or replacement. RV auxiliary systems depend on four primary chemistries: traditional flooded lead-acid, Absorbent Glass Mat (AGM), gel cell, and lithium iron phosphate (LiFePO4).
| Battery Chemistry | Typical Cost (Per 100Ah 12V) | Usable Depth of Discharge (DOD) | Cycle Life (to 80% Capacity) | Average Lifespan | Weight (Per 100Ah) | Maintenance Required |
|---|---|---|---|---|---|---|
| Flooded Lead-Acid | $150 – $300 | 50% | 300 – 500 cycles | 2 – 5 Years | 55 – 65 lbs | High (distilled water top-ups) |
| AGM (Sealed) | $250 – $500 | 50% – 60% | 400 – 800 cycles | 4 – 7 Years | 60 – 70 lbs | None (sealed, zero maintenance) |
| Gel Cell | $300 – $600 | 50% | 500 – 1,000 cycles | 4 – 8 Years | 65 – 75 lbs | None (requires strict low-voltage charging) |
| LiFePO4 (Lithium) | $400 – $1,000 | 80% – 100% | 3,000 – 5,000+ cycles | 8 – 12+ Years | 28 – 32 lbs | None (integrated BMS manages cells) |
Flooded lead-acid batteries represent the traditional, low-cost baseline. However, they vent hydrogen gas under charge, require dedicated exterior ventilation, and demand routine fluid inspections. If neglected, plate exposure leads to permanent sulfation. Always inspect your battery compartment for cracked casings, corrosion, or signs of a leaking RV battery before heading out on long trips.
AGM batteries encapsulate their electrolyte in glass fiber mats. They are spill-proof, withstand heavy road vibration, and charge up to five times faster than flooded units without needing water additions. Gel cell batteries suspend electrolyte in a silica paste, providing superior deep-discharge resilience, though they require precise charge voltages to avoid permanently baking air pockets into the gel.
LiFePO4 chemistry provides a major leap in energy density and efficiency. A 300Ah lead-acid bank weighs upwards of 400 pounds and delivers only 150Ah of usable power before dropping below safe voltage thresholds. In contrast, a 300Ah lithium bank weighs around 65 pounds and delivers 3,600 watt-hours of usable energy with a flat voltage discharge curve. Because of these distinct advantages, the RV Industry Association is updating technical standards to support the widespread adoption of lithium storage.
House Batteries vs. Engine Starting Batteries
A motorhome features two distinct electrical domains: the chassis starter system and the house auxiliary bank.
- Chassis Starting Batteries: Engineered with thin, porous lead plates to deliver massive Cold Cranking Amps (CCA) for several seconds to turn over high-displacement engines. Repeated deep discharges will ruin a starting battery in short order.
- Deep-Cycle House Batteries: Built with thick, solid plates (or lithium cells) designed for steady, continuous current over hours or days. They endure repeated discharges down to their rated capacity limits.
- Dual-Purpose Marine/RV Batteries: A hybrid design offering moderate cranking amps alongside modest cycling capability. While suitable for simple travel trailers with minimal 12V demands, they do not match the longevity of dedicated deep-cycle banks when boondocking.
Sizing and Capacity for Your Battery Replacement for RVs
Matching battery size to your electrical lifestyle requires a straightforward energy audit. Sum the power consumption of all onboard DC devices and AC appliances run through an inverter:
- LED Interior Lighting: 20 watts × 4 hours = 80 watt-hours
- 12V Compressor Refrigerator: 50 watts × 12 hours (duty cycle) = 600 watt-hours
- Water Pump & Furnace Fan: 70 watts × 3 hours = 210 watt-hours
- Laptop & Phone Charging: 60 watts × 3 hours = 180 watt-hours
- Total Daily Energy Consumption: 1,070 watt-hours (roughly 89 amp-hours at 12 volts)
To support this 89Ah daily demand for two days of off-grid dry camping without recharging, you need roughly 178Ah of usable energy. With lead-acid (which has a 50% depth-of-discharge limit), you need a minimum 360Ah bank. With LiFePO4, a single 200Ah battery covers your needs.
Battery enclosures conform to standardized Battery Council International (BCI) physical dimensions:
- Group 24: Measures roughly 10.25 × 6.8 × 8.8 inches; typically supplies 70–85Ah in lead-acid or 100Ah in lithium.
- Group 27: Measures roughly 12.0 × 6.8 × 8.8 inches; delivers 85–105Ah in lead-acid.
- Group 31: Measures roughly 13.0 × 6.8 × 9.4 inches; delivers 100–125Ah in lead-acid or up to 135Ah in high-capacity lithium cases.
Always measure your battery box clearance, including terminal height and hold-down bracket positions, before ordering replacements.
Selecting the Right Battery Configuration for Off-Grid Travel
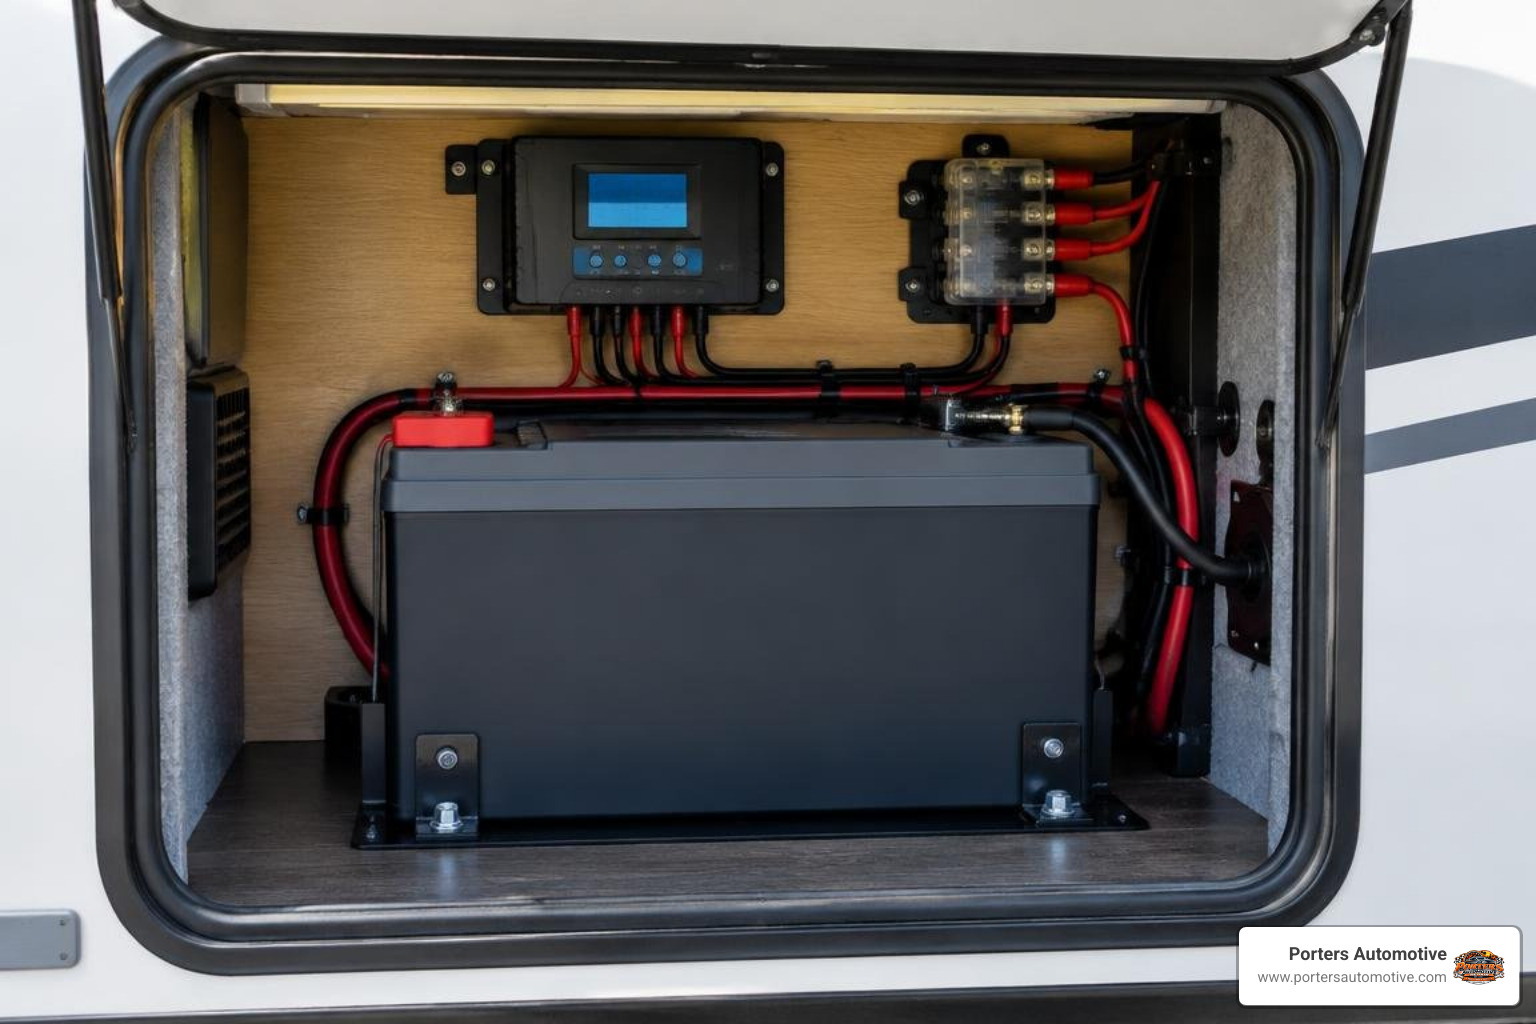
Extended off-grid boondocking places heavy demands on auxiliary storage. High-draw appliances such as induction cooktops, coffee makers, and air conditioners quickly pull 100 to 200 amps through an inverter. To maintain stable voltage without tripping onboard safety circuits, your bank must be sized to handle continuous peak discharge rates.
Off-grid setups benefit immensely from smart lithium units equipped with internal Battery Management Systems (BMS). A quality BMS protects against short circuits, overcharging, and cell imbalance. If you travel during shoulder seasons or through northern climates, choose units with integrated self-heating elements. While LiFePO4 cells safely discharge in sub-zero conditions down to -4°F, their internal chemistry permanently degrades if charged below freezing (32°F). Self-heating packages divert charge current into internal warming pads until the core reaches a safe temperature.
Real-world RV owners sharing their community experiences with deep-cycle setups frequently emphasize that maximizing storage capacity within the existing battery footprint eliminates power anxiety on the road.
Upgrading from Lead-Acid to LiFePO4 Systems
Upgrading to lithium is rarely a simple drop-and-forget job. Because lithium requires higher, steady charging voltages (typically 14.4V to 14.6V bulk/absorption and 13.6V float), older RV converter/chargers designed for lead-acid will only charge lithium banks to roughly 70–80% capacity.
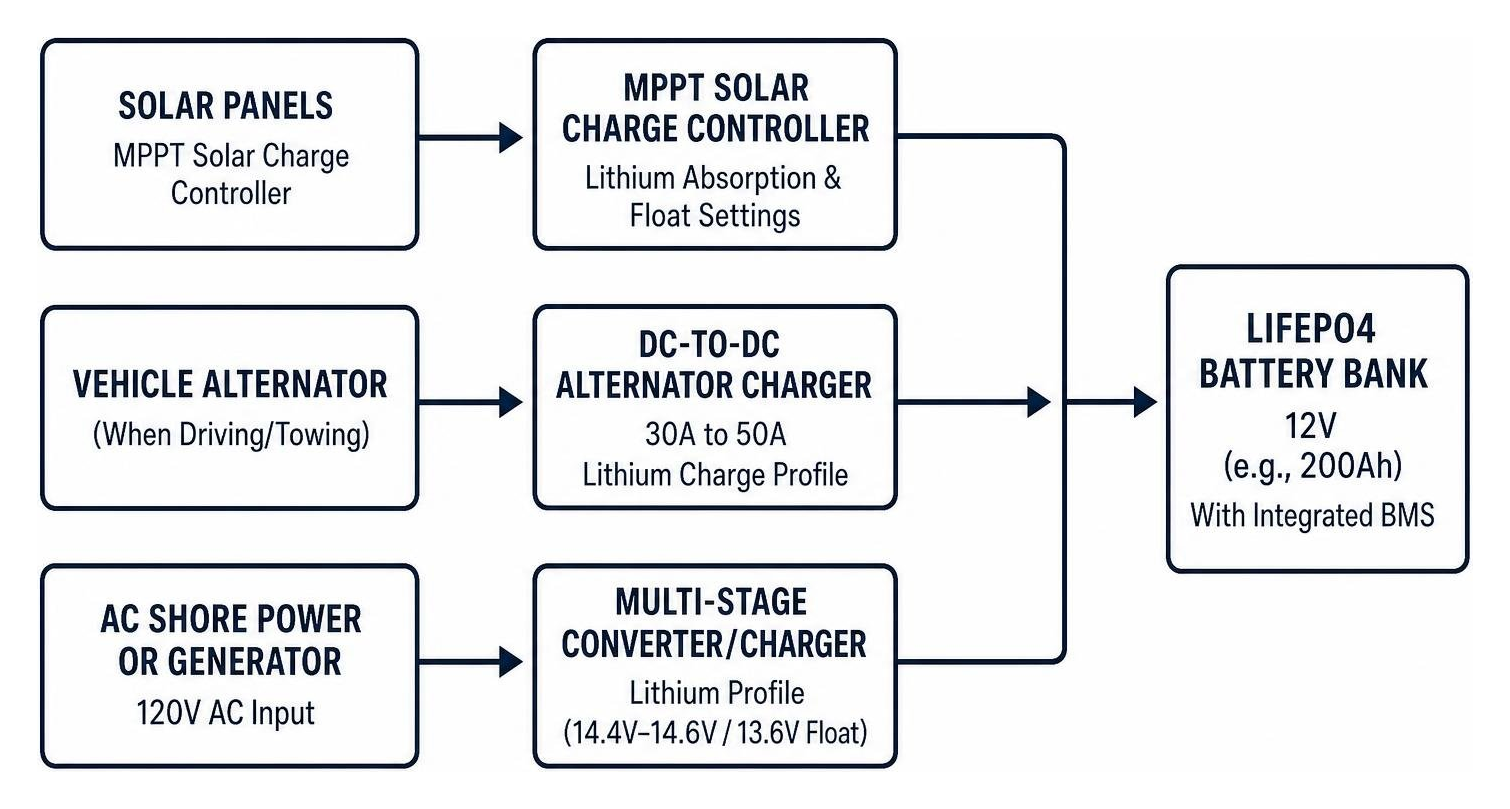
Key components to review during a conversion include:
- Multi-Stage Converter/Charger: Replace older units with a lithium-profile converter or an adjustable inverter/charger.
- DC-to-DC Charger: When towing or driving a motorhome, lithium batteries will pull as much current as possible from the engine alternator. Installing an inline 30A to 50A DC-to-DC charger prevents alternator overheating while delivering the correct charge profile.
- MPPT Solar Charge Controller: Reprogram solar charge profiles to match the manufacturer's lithium absorption and float parameters.
- Heavy-Gauge Wiring: High-current inverter draws demand upgraded cable sizing. Move from factory 6-gauge or 4-gauge lines up to 2/0 or 4/0 pure copper welding cables with hydraulic-crimped, sealed lugs.
How to Spot Battery Failure and Calculate Replacement Costs
Batteries rarely fail without warning. Watch for these common signs of trouble:
- Rapid Voltage Drop Under Load: Interior lights dim significantly when the water pump kicks on.
- Shortened Runtime: The bank drains overnight despite running only low-draw background electronics.
- Physical Case Distortion: Swollen or bulging side walls indicate severe thermal runaway or internal short circuits.
- Pungent Sulfur Odor: A "rotten egg" smell indicates boiling electrolyte caused by an overcharging converter.
- Severe Terminal Corrosion: Heavy white or blue crusting around posts creates high resistance, starving your RV of stable voltage.
Testing battery health requires a digital multimeter and a carbon-pile or digital conductance load tester. Measure the resting voltage after isolating the battery for at least two hours with no charging or loads active:
- 12.7V or higher: 100% State of Charge (Lead-Acid)
- 12.2V: ~50% State of Charge (Lead-Acid requires immediate recharge)
- 11.9V or below: Fully Discharged (Plate sulfation begins)
For lithium cells, open-circuit voltage stays flat across most of the cycle (resting around 13.2V to 13.4V). A precision shunt-based battery monitor provides the most accurate state-of-charge readout.
Basic single-battery lead-acid replacements cost between $150 and $400 for parts. Full multi-battery lithium conversions range from $1,850 to $5,500 depending on wiring upgrades and charging hardware. Over a five-year timeline, lithium often proves more economical. A 200Ah AGM bank setup requires $1,600 to $2,400 initially, plus replacement costs of another $1,600 within 4 to 5 years ($3,200 to $4,800 total). A 200Ah lithium installation costs $1,850 to $2,950 up front and easily lasts a decade without secondary purchases. Planning your upgrades as part of an affordable vehicle maintenance strategy keeps long-term ownership costs predictable.
Step-by-Step Installation of a Battery Replacement for RVs
- Disconnect Shore Power and Inverters: Unplug the RV from grid power, turn off the onboard generator, and switch solar disconnect breakers to the "Off" position.
- Suit Up with Safety Gear: Wear chemical-resistant gloves and eye protection to guard against acid residue and arc flash.
- Remove the Negative Terminal First: Disconnect the black (negative/ground) cable first. This prevents accidental short circuits if your wrench touches the metal chassis while loosening connections.
- Disconnect Positive Connections and Hardware: Remove the red (positive) leads, unbolt the hold-down strap, and lift the heavy battery straight out using lifting handles.
- Clean and Neutralize the Tray: Clear dirt and neutralize any dried acid in the battery tray using a solution of water and baking soda. Wire-brush the cable eyelets to bare, shiny metal.
- Seat and Secure the New Battery: Lower the replacement battery into the tray and fasten the hold-down bracket securely.
- Connect Positive Terminals First: Attach all positive cables, ensuring inline fuses (such as Class-T or ANL fuses) are installed close to the positive battery post.
- Connect Negative Terminals and Shunt: Attach all negative returns and your battery monitor shunt. Torque all terminal bolts to manufacturer specifications (typically 80–100 inch-pounds for bolt-down lithium terminals).
- Recycle the Core: Take the old lead-acid core to an automotive service center for proper recycling.
Maintenance and Seasonal Storage Best Practices
Extend battery service life by managing off-season storage carefully:
- Eliminate Parasitic Draws: Smoke detectors, LP gas sensors, and stereo memories drain 1 to 3 amps continuously, killing a battery in weeks. Use a master battery disconnect switch on the negative cable during storage.
- Maintain Correct Storage Voltage: Fully charge lead-acid units to 100% before parking the RV. For LiFePO4 batteries, store them disconnected at roughly 50% to 60% state of charge (around 13.2V) in a temperate environment.
- Avoid Cold-Weather Charging: If your RV is stored in freezing winter conditions without internal heating pads, disconnect charge controllers to prevent accidental low-temperature charging.
- Inspect Terminals Bi-Annually: Clean contact posts and apply dielectric grease or anti-corrosion spray to seal out moisture.
Frequently Asked Questions About RV Battery Replacement
Can I replace my RV lead-acid batteries with lithium without modifying my electrical system?
While lithium batteries fit into standard Group 24, 27, or 31 battery trays, running them on a stock lead-acid converter will only charge the bank to roughly 80% capacity. Additionally, direct alternator charging through traditional 7-pin trailer wiring or motorhome solenoids can overload your engine's alternator. To get the full benefit and protect your vehicle, upgrade your converter to a lithium-compatible model and install an inline DC-to-DC charger.
How long should I expect a replacement RV battery to last?
Flooded lead-acid batteries last 2 to 5 years, while sealed AGM units generally last 4 to 7 years. Quality LiFePO4 lithium batteries deliver 3,000 to 5,000 discharge cycles, translating to 8 to 12 or more years of reliable service under normal travel conditions.
How do extreme weather conditions affect RV battery performance?
High ambient temperatures above 95°F accelerate internal grid corrosion in AGM and lead-acid batteries, shortening their overall lifespan. In cold weather, available capacity temporarily drops across all battery types. While lithium discharges down to -4°F, attempting to charge standard lithium cells below 32°F causes permanent damage. Always select heated lithium batteries if you frequently camp in sub-freezing temperatures.
Conclusion
A reliable battery bank is the foundation of electrical independence on the road. Matching your battery chemistry, physical group size, and charging setup to your travel style ensures your lights stay on, your refrigerator runs cold, and your adventures stay on track.
At Porters Automotive, our technicians help drivers and RV owners across Tallahassee, Quincy, and Bradfordville stay road-ready with comprehensive electrical diagnostics and installation. If you need help testing an existing auxiliary bank or configuring a modern system upgrade, schedule an appointment through our professional diagnostic and battery services before your next trip. Safe travels!