November 2026 · Shop tips
Test the Brake Booster Check Valve Before Replacing Parts
Test the Brake Booster Check Valve Before Replacing Parts
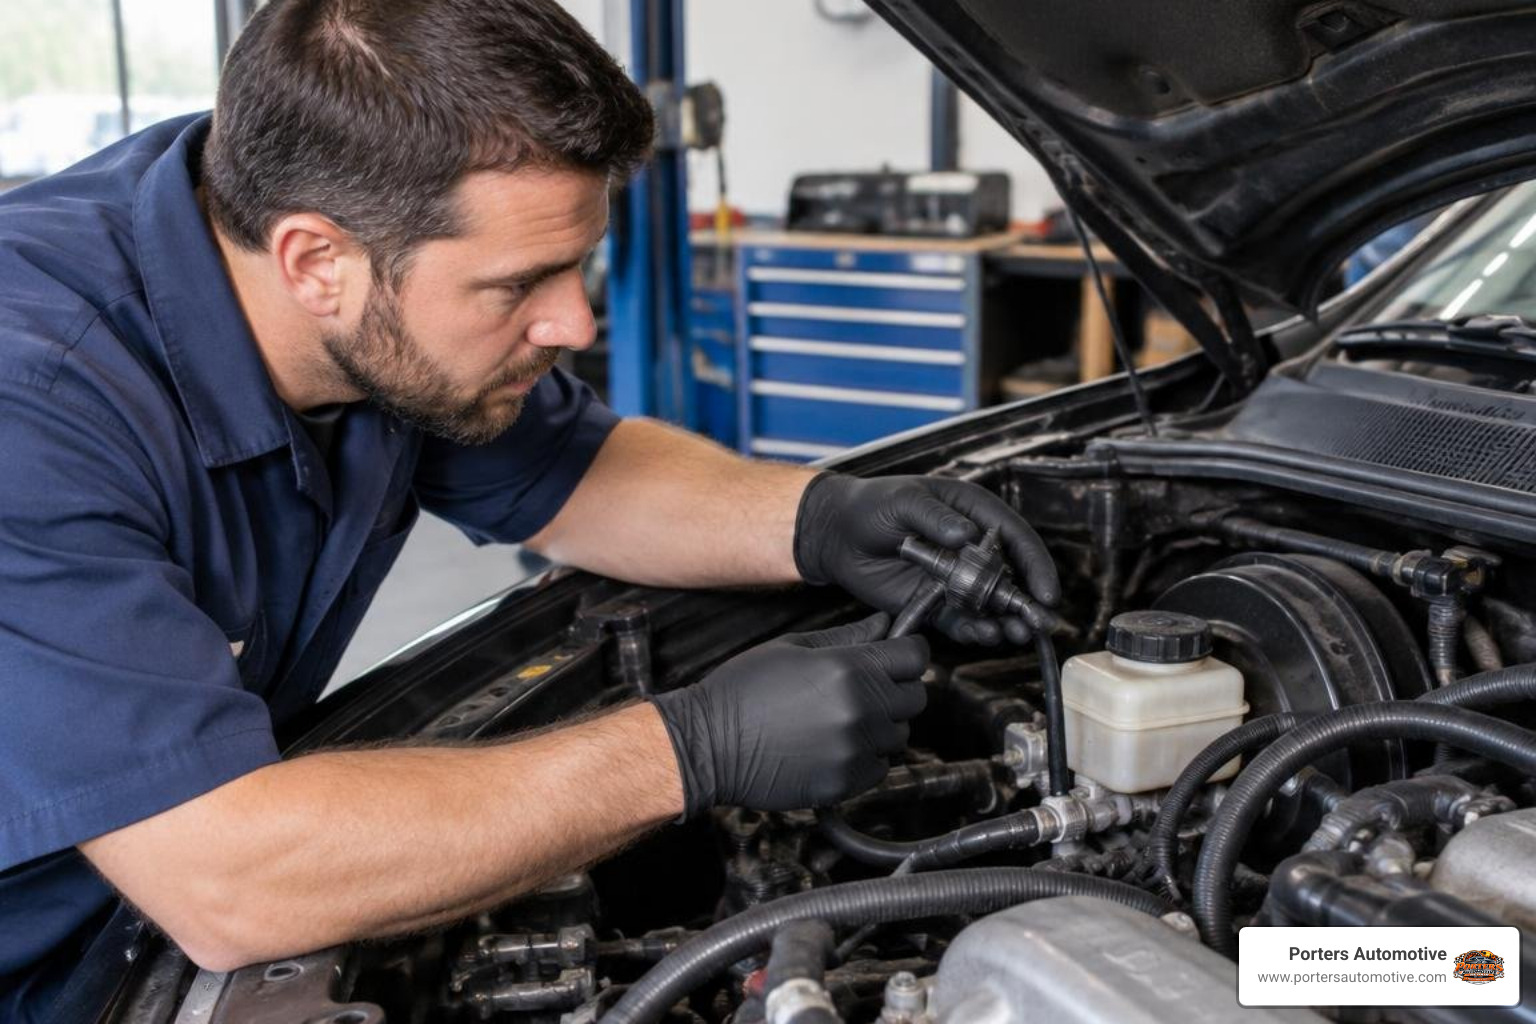
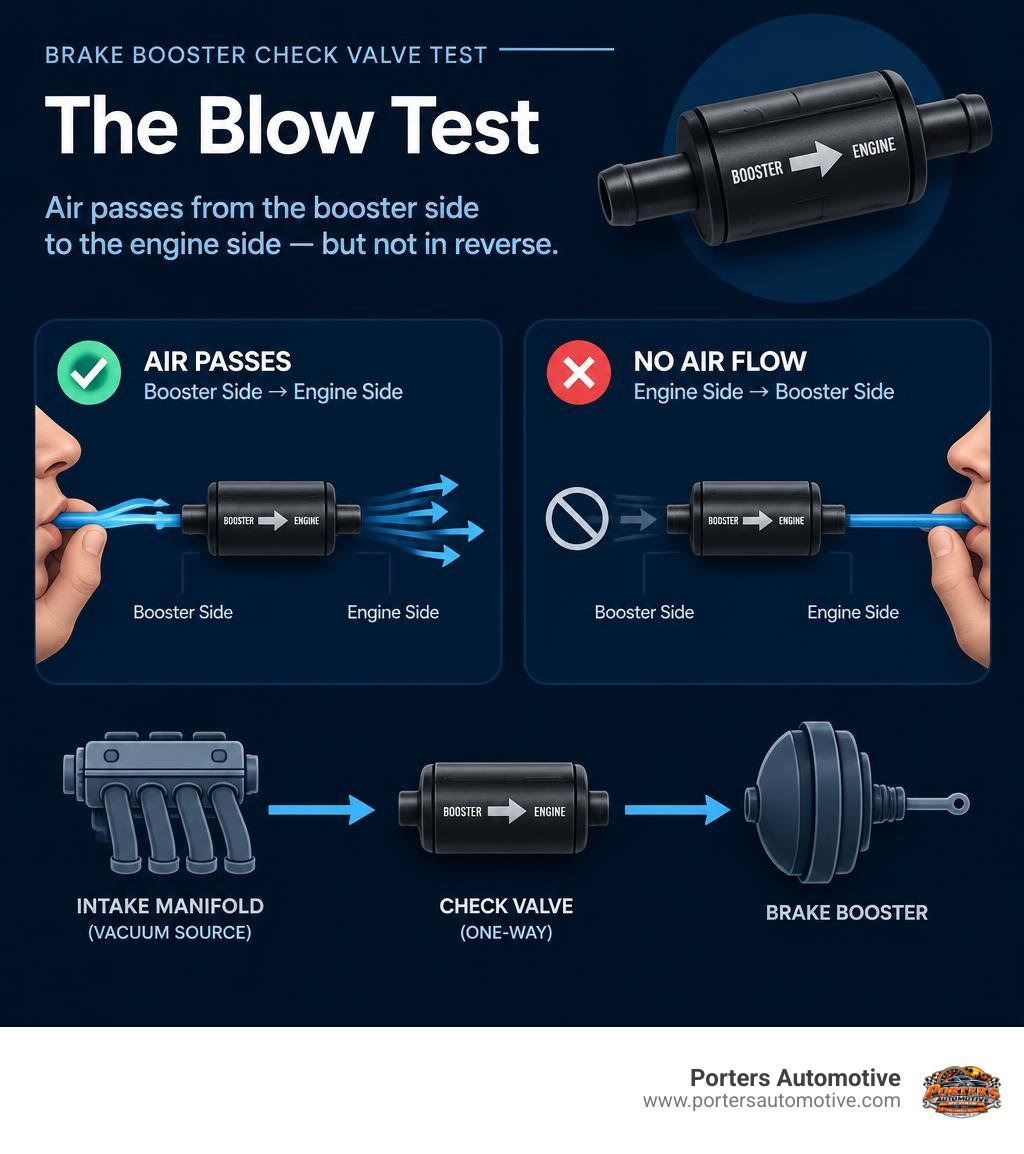
For a quick brake booster check valve test, turn the engine off and remove the valve from the vacuum hose or booster. Blow gently through a clean tube attached to the booster side: air should pass toward the engine side. Reverse the valve and try again. Air should not pass back toward the booster. If it flows both ways or neither way, the valve may need replacement.
A hard brake pedal can also come from a leaking hose, a cracked grommet, or the booster itself. This quick test helps you check the small part before paying for a larger repair.
I'm Heath Porter, owner of Porters Automotive. I've worked in automotive service since 2006, and a brake booster check valve test is one way to narrow down a loss of brake assist before recommending repairs.
Understanding the Role and Symptoms of a Failing Check Valve
A vacuum brake booster relies on differential pressure to multiply the force your foot exerts on the master cylinder. In a standard gasoline vehicle, the engine's intake manifold generates significant vacuum pressure during operation. The brake booster check valve is a simple one-way mechanism installed between the intake manifold (or dedicated vacuum pump) and the booster housing.
Its primary job is to let air be drawn out of the brake booster while preventing air or manifold backpressure from entering it. When you accelerate hard or the engine shuts off, manifold vacuum drops. The check valve seals shut instantly, trapping stored vacuum inside the booster. This vacuum retention ensures you retain reserve power braking for two or more pedal strokes even if the engine stalls.
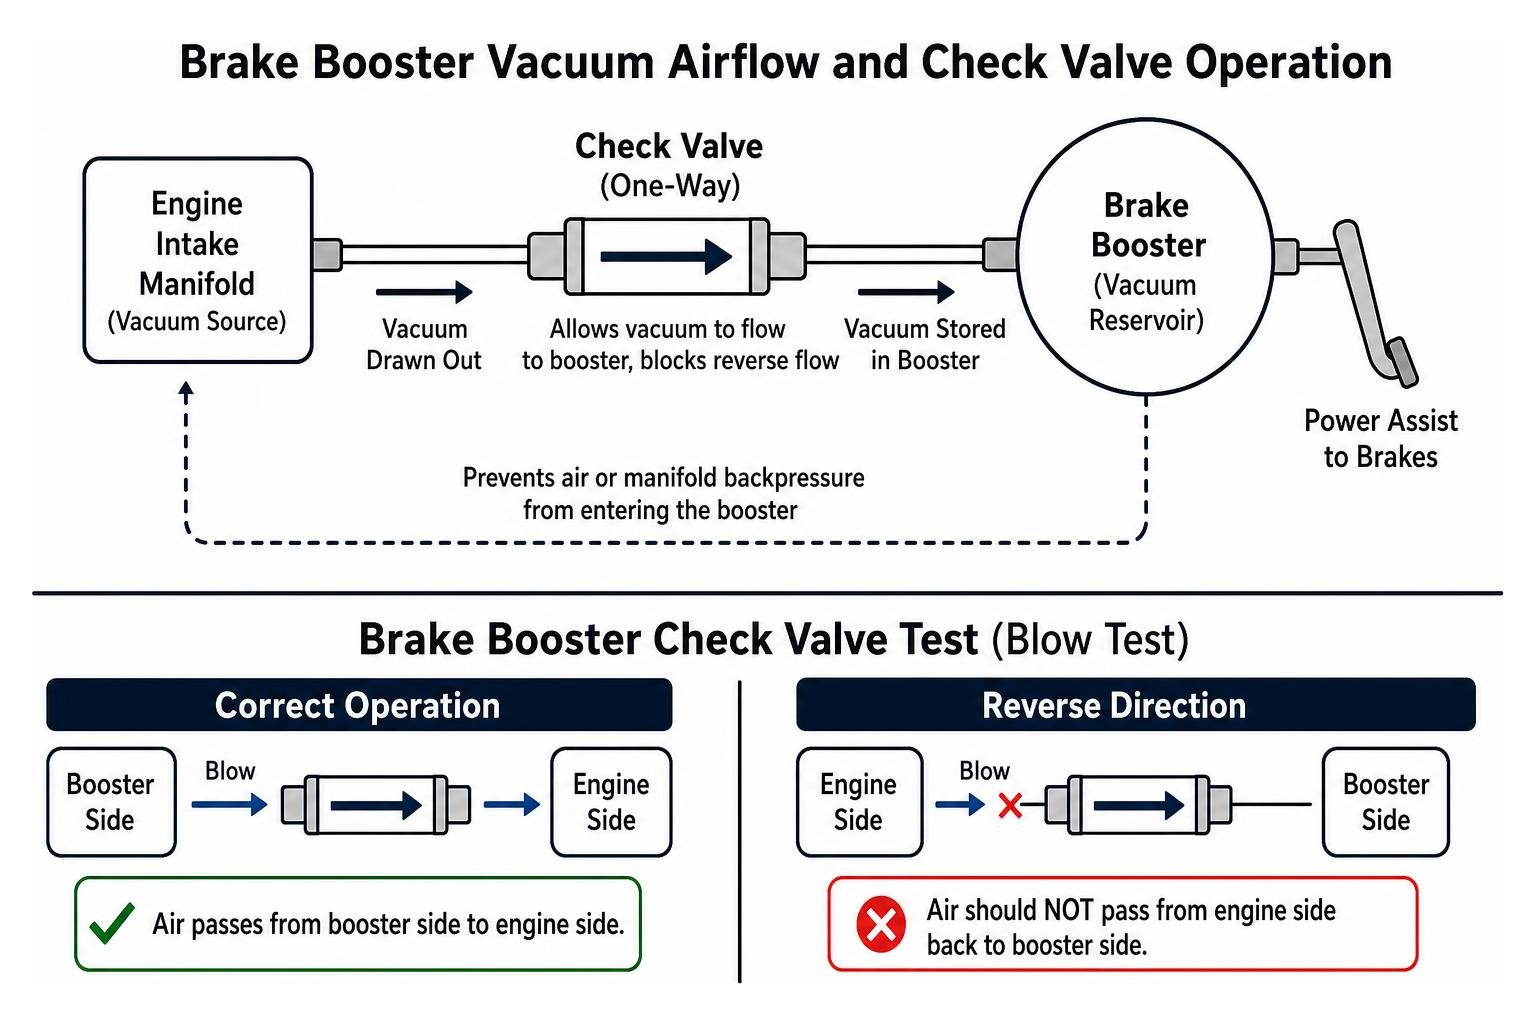
When this valve fails, it typically either sticks open, jams shut, or leaks around its housing. If it sticks open, booster vacuum bleeds off into the intake manifold whenever engine vacuum drops, leading to an erratic or rock-hard brake pedal. If it jams shut, no vacuum ever reaches the booster, leaving you with zero power assist at all times.
| Symptom | Bad Brake Booster Check Valve | Failing Brake Booster Assembly |
|---|---|---|
| Brake Pedal Feel | Hard pedal after sitting or during sudden engine stall; may feel normal during steady cruising | Consistently stiff or hard pedal under all engine operating conditions |
| Audible Hissing | Minor hissing possible near the grommet seal under the hood | Distinct, continuous hissing inside the cabin under the dashboard when depressing the pedal |
| Engine Idle Behavior | Engine may hesitate or stumble slightly if the valve leaks unmetered air | Noticeable engine idle drop or rough idle whenever the brake pedal is pushed down |
| Vacuum Retention | Loss of vacuum within seconds after engine shutdown (zero reserve pedal strokes) | Booster fails to hold vacuum even if the check valve is fully functional |
| Component Replacement Cost | Inexpensive fix (typically $15 to $50 for parts) | Moderate to high expense (booster unit, master cylinder bench bleed, labor) |
Why Check Valves Fail
Check valves endure harsh conditions under the hood. The most common reasons for failure include:
- Rubber Diaphragm Degradation: The internal flapper or diaphragm is made of elastomer materials that dry out, crack, or warp over years of heat cycles.
- Oil Contamination and Crankcase Blow-By: High crankcase pressure or faulty PCV systems can push oily vapor into the intake manifold. Over time, engine oil coats the check valve's internal seat, causing the rubber to swell, soften, or stick open.
- Plastic Fatigue and Cracking: The outer plastic housing can become brittle from radiant engine heat, developing hairline cracks along the vacuum barb or body seam.
- Debris Blockage: Fine carbon particles from the intake tract can lodge between the valve seal and seat, preventing an airtight seal.
Step-by-Step Brake Booster Check Valve Test Methods
Before buying replacement components, running a few systematic tests can save you significant time and money. You will need a pair of pliers, a clean length of rubber hose, and ideally a handheld vacuum pump with an integrated pressure gauge.
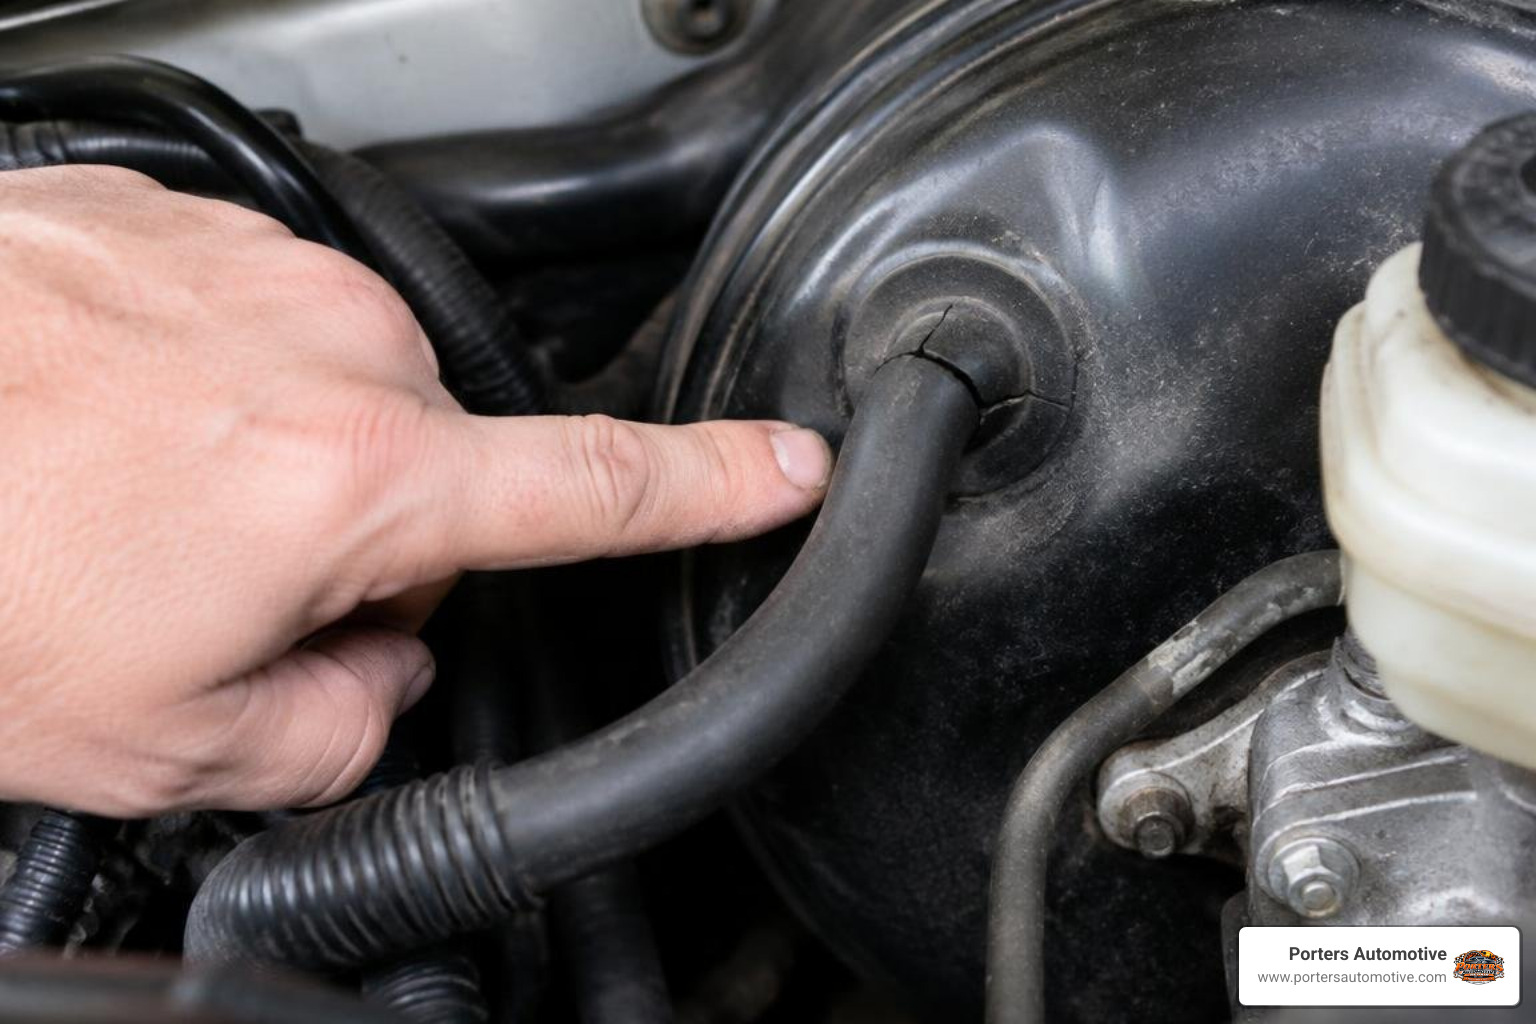
Start with a thorough visual check. Inspect the vacuum supply line running from the intake manifold or vacuum pump to the booster. Ensure it is the correct reinforced vacuum hose (typically 11/32-inch internal diameter) rather than standard heater hose, which can collapse under heat and suction. Check the rubber grommet on the face of the booster where the valve seats. If the grommet is cracked, rotted, or loose, it will leak vacuum regardless of the check valve's condition.
How to Perform a Manual Brake Booster Check Valve Test (The Blow Test)
The manual blow test is the fastest way to confirm whether the one-way valve mechanism is working.
- Turn off the engine and set the parking brake.
- Disconnect the vacuum hose from the check valve barb on the booster.
- Carefully remove the check valve from the rubber grommet on the brake booster shell using a gentle twisting and pulling motion. Do not pry aggressively against the booster casing.
- Attach a clean piece of hose to the valve port that inserts into the brake booster.
- Blow into the tube: Air should flow freely through the valve toward the engine side.
- Suck on the tube (or blow into the opposite engine port): The valve should instantly snap closed, blocking any airflow.
If air passes freely in both directions, the internal flapper is torn or stuck open. If air cannot pass in either direction, the valve is clogged shut. In either scenario, follow standard Toyota Camry factory service procedures or your vehicle manufacturer's guidelines and replace the valve.
Using a Vacuum Gauge for a Brake Booster Check Valve Test
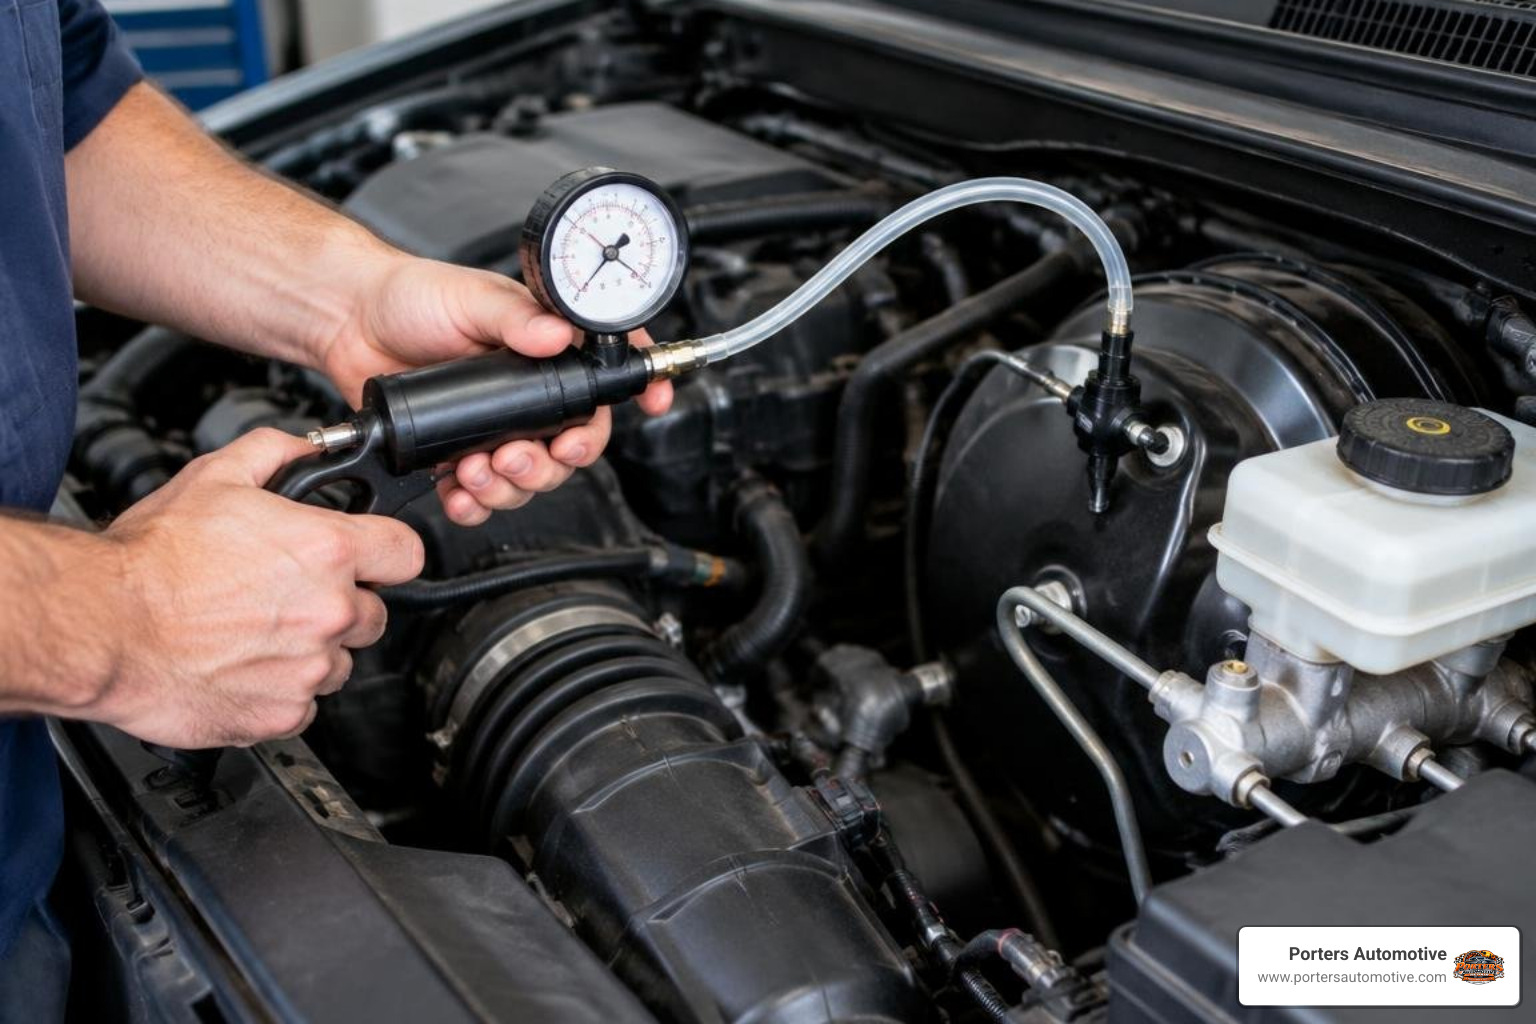
A handheld vacuum pump with a gauge provides exact quantitative data on seal integrity and vacuum supply.
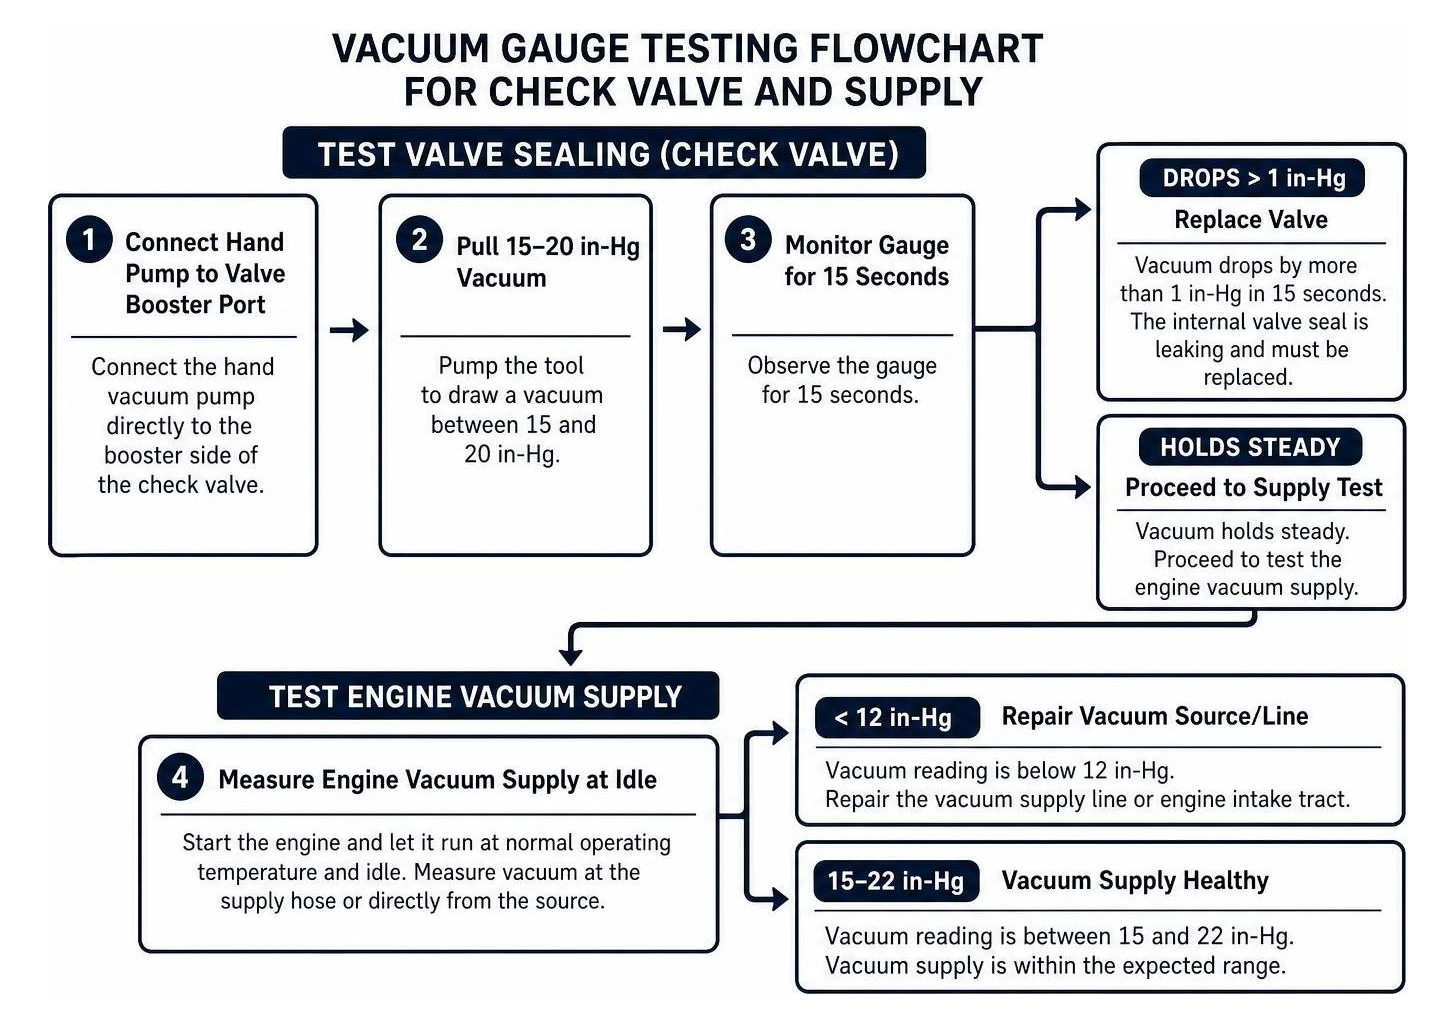
- Test Valve Sealing: Connect the hand vacuum pump directly to the booster side of the check valve. Pump the tool to draw a vacuum between 15 and 20 inches of mercury (in-Hg). Observe the gauge for 15 seconds. If the vacuum drops by more than 1 in-Hg (33 millibars) in that 15-second window, the internal valve seal is leaking and must be replaced.
- Test Engine Vacuum Supply: Reinstall the check valve into the vacuum hose (leaving it out of the booster grommet) or connect your gauge directly to the supply hose. Start the engine and let it run at normal operating temperature and idle. A healthy engine or mechanical vacuum pump should produce at least 16 to 18 in-Hg of vacuum. As noted in standard OEM vacuum supply specifications for vehicles like the Ford Edge, an idle vacuum reading between 51 and 74 kPa (15 to 22 in-Hg) is expected. If your reading falls below 12 in-Hg (406 millibars), the vacuum supply line or engine intake tract must be addressed before blaming the brake components.
In-Vehicle Booster and Vacuum System Integrity Tests
You can evaluate the entire vacuum-assist system—including the booster shell, internal diaphragm, and check valve—without taking anything apart by using standard in-vehicle tests.
- Deplete Residual Vacuum: With the ignition off, pump the brake pedal 5 to 6 times until the pedal feels noticeably firm and high. This exhausts all stored vacuum from the booster chamber.
- Perform the Pedal Drop Test: Keep your foot firmly pressed on the stiff brake pedal with moderate pressure (roughly 15 to 25 pounds of force), then start the engine. As soon as the engine catches and generates vacuum, the pedal should drop slightly toward the floor (about 1/4 to 1/2 inch) and require much less effort to hold. If the pedal remains completely rigid, vacuum is not reaching the booster, or the booster's internal diaphragm has failed.
- Evaluate Vacuum Retention (Decay Test): Let the engine idle for about one minute to establish full vacuum in the booster. Turn the engine off and wait 90 seconds. Press the brake pedal down firmly. You should get at least two normal, power-assisted pedal applications before the pedal becomes hard. If the pedal is hard on the very first stroke after sitting for 90 seconds, the check valve or booster has an external leak.
According to established vacuum decay test standards, an overall system vacuum loss of no more than 2 in-Hg over an 8-minute period is considered acceptable for maintaining reliable braking assist.
Inspecting Hoses and Grommets for Secondary Leaks
A cracked grommet or split vacuum hose often mimics a bad check valve. To isolate external air leaks:
- Soapy Water / Carb Cleaner Method: With the engine idling, lightly mist soapy water or automotive brake cleaner around the check valve grommet, booster seam, and intake manifold nipple. If the engine idle speed changes or bubbles get sucked inward, you have located an external vacuum leak.
- Hose Pliability Check: Squeeze the vacuum supply line along its entire length. Feel for soft spots, kinks, or collapsed internal walls.
- To keep up with regular maintenance advice and technical tips, check out our latest automotive news and maintenance guides.
Replacing the Valve vs. Replacing the Entire Booster Assembly
Because a faulty check valve produces the same stiff pedal as an internal booster failure, many drivers replace the entire booster unit prematurely.
Replacing a check valve and grommet is an inexpensive DIY repair that requires no bleeding of hydraulic lines. The valve simply presses into the rubber grommet on the booster housing. Conversely, replacing the entire brake power booster requires disconnecting the brake pedal linkage under the dash, unbolting the master cylinder, and often bleeding the hydraulic brake lines to prevent trapped air.
| Consideration | Check Valve & Grommet Replacement | Complete Brake Booster Replacement |
|---|---|---|
| Typical Parts Cost | $10 – $40 | $150 – $450+ |
| Labor Time | 10 to 15 minutes | 2 to 4 hours |
| Hydraulic Work Required? | No brake fluid lines touched | Yes; master cylinder removal often requires system bleeding |
| When to Choose | Valve fails blow test, loses vacuum on hand pump, or grommet is dry-rotted | Valve tests good, but booster hisses under dash, fails pedal drop, or has torn internal diaphragm |
Frequently Asked Questions About Brake Booster Diagnostics
Can a bad check valve cause an engine misfire or rough idle?
Yes. Because the brake booster connects directly to the intake manifold, a check valve that is cracked or leaking allows unmetered, unmeasured air to enter the engine. This dilutes the air-fuel mixture, causing a lean condition that can trigger check engine light codes (such as P0171 or P0174), rough idling, or occasional engine misfires at idle.
How much vacuum does a brake booster need to operate properly?
A vacuum brake booster requires at least 18 in-Hg of vacuum for optimal stopping power and normal pedal effort. If the vacuum supply drops below 16 in-Hg, the brake pedal will begin to feel noticeably harder. If the vacuum supply measures less than 12 in-Hg, the booster will struggle to deliver meaningful assist, and the engine vacuum source or auxiliary pump must be repaired immediately.
Can you drive with a bad brake booster check valve?
We strongly advise against driving with a compromised check valve. While the hydraulic portion of your brakes will still function, the pedal will require substantially higher physical force to stop the car. More importantly, if your engine stalls while driving, you will lose all power braking assist instantly instead of retaining the normal 2 to 3 assisted emergency stops provided by a sealed reserve vacuum chamber.
Conclusion
A hard or unresponsive brake pedal is a serious safety concern, but the fix is not always an expensive replacement booster. Taking 15 minutes to run through these vacuum and airflow checks will confirm whether a simple $20 check valve or rubber grommet is all that stands between you and safe, confident stopping power.
If your brake pedal remains stiff, your vacuum readings fall below specification, or you prefer to have a professional handle your vehicle's safety systems, we are here to help. At Porters Automotive, our certified technicians have served drivers across Tallahassee, Quincy, and Bradfordville, FL, with precise diagnostics and reliable repairs since 2006. Feel free to schedule complete vehicle repair and maintenance services or reach out to our team via our contact page to ensure your vehicle stops smoothly every time.