October 2026 · Shop tips
How to Replace a 62TE Shift Solenoid Pack
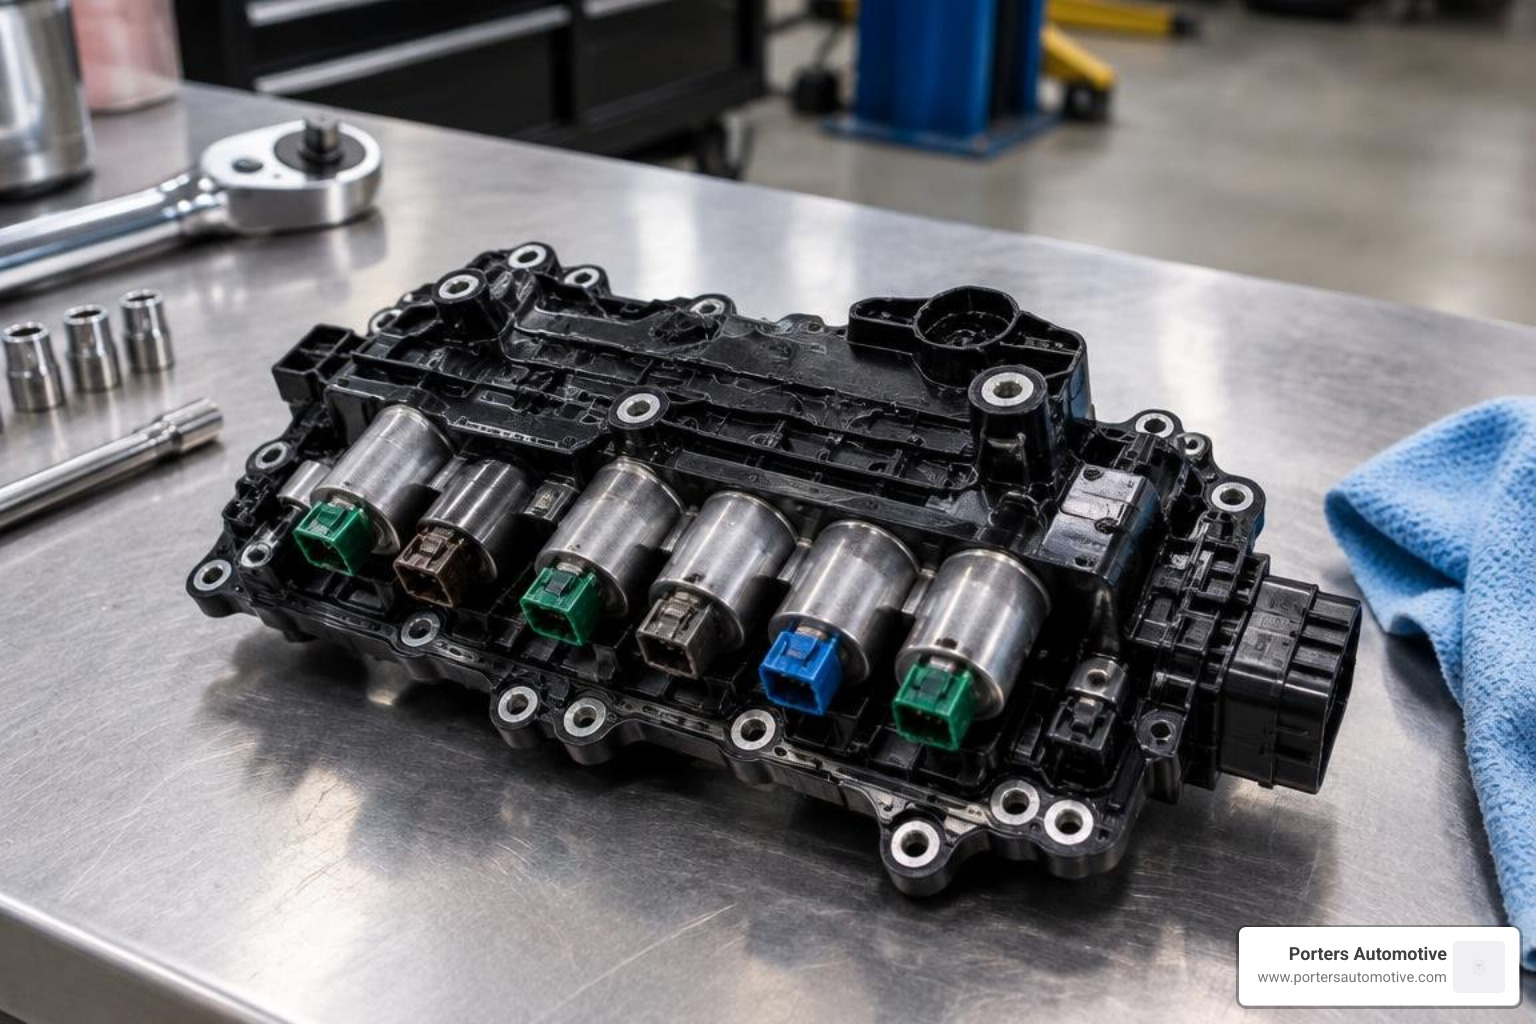
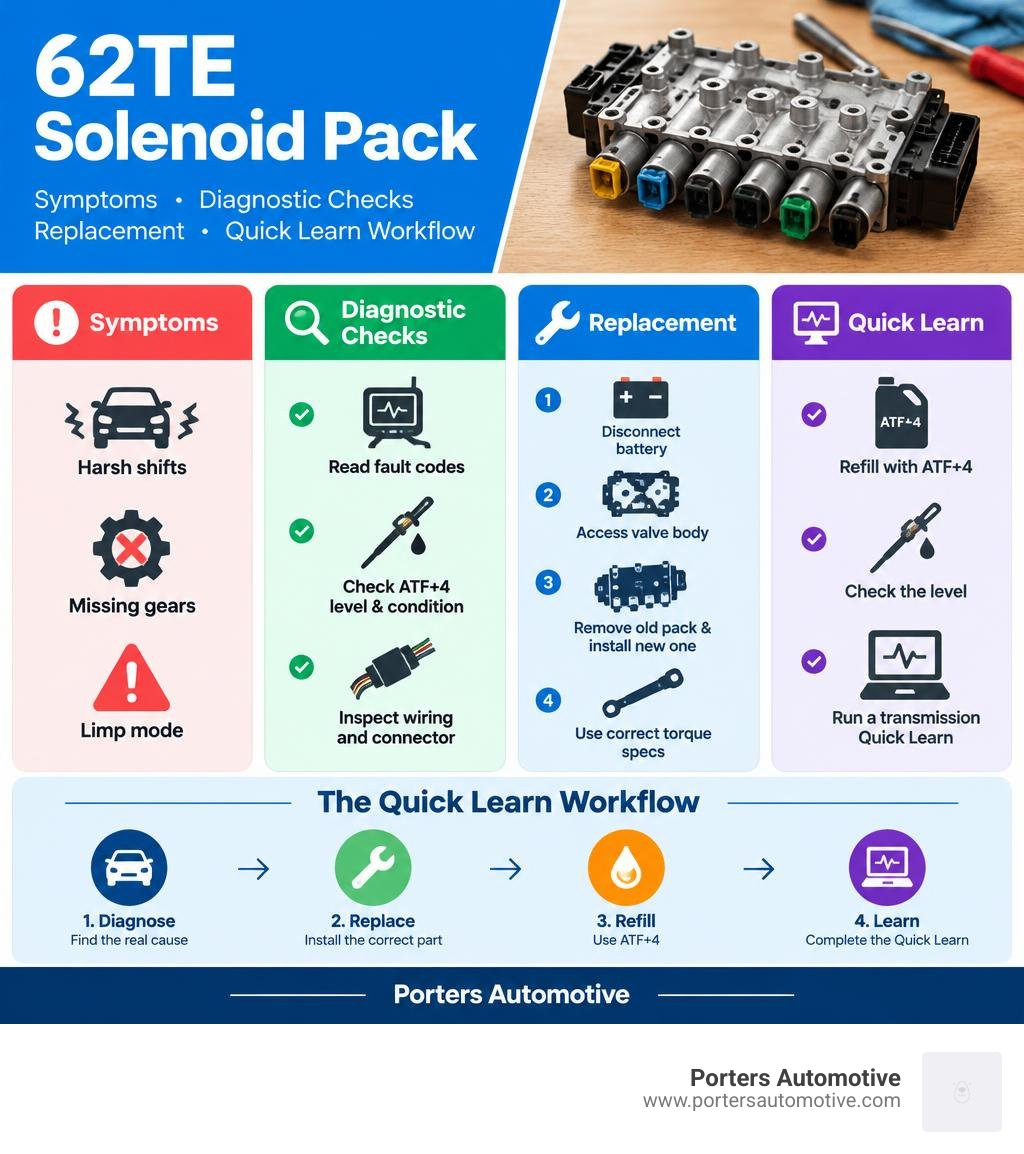
Start with a diagnosis, not a new part. Read the transmission fault codes, check the ATF+4 fluid level and condition, and inspect the wiring and connector. If testing points to the pack, disconnect the battery, access the transmission valve body, remove the old pack, and install the correct replacement using the torque specs for your vehicle. Refill with ATF+4, check the level, and run a transmission Quick Learn with a compatible scan tool.
Harsh shifts, missing gears, or limp mode can point to a bad solenoid pack, but low fluid or a wiring fault can cause similar trouble. Confirming the fault first can save you the cost of a part you did not need.
I'm Heath Porter, owner of Porters Automotive, and I've worked in automotive service since 2006. I bring that hands-on experience to this guide to 62TE shift solenoid replacement, starting with the checks to make before you turn a wrench.
Symptoms, Diagnostic Trouble Codes, and Bench Testing
The Chrysler 62TE six-speed automatic transmission has seen service in millions of minivans, sedans, and crossovers. When it works well, it delivers smooth cruising; when it misbehaves, it can feel like the transmission is having an identity crisis. Across its production run, NHTSA 62TE complaint records show nearly 20,000 owner complaints across dozens of vehicle models, with shift solenoid and hydraulic control faults consistently sitting near the top of that list.
A failing solenoid pack will rarely keep its troubles quiet. Common warning signs include:
- Limp Mode (Gear Lockout): The vehicle locks itself in 3rd gear (or occasionally 2nd) and refuses to upshift or downshift, capping your road speed.
- Harsh Engagement or Shift Flaring: Violent clunks into drive or reverse, or engine RPM flaring up between 2nd, 3rd, or 4th gear before slamming into gear.
- Missing Upper Gears: Inability to access 5th or 6th gear on the highway.
- Delayed Reverse: Waiting several seconds after moving the shift lever before reverse engages.
When these symptoms appear, the Transmission Control Module (TCM) or Powertrain Control Module (PCM) sets Diagnostic Trouble Codes (DTCs). The most frequent codes include:
- P0700: Generic transmission control system malfunction (a flag telling the main computer that the TCM has stored specific sub-codes).
- P0750, P0755, P0760, P0765: Electrical faults in the shift solenoid circuits (P0765 specifically targets the Underdrive Solenoid Circuit).
- P076A, P076B, P076E: Shift Solenoid "H" performance or electrical faults. Notably, FCA issued Customer Satisfaction Notification V46 covering roughly 33,000 Ram ProMaster vehicles because solenoid coil terminals built out of specification caused intermittent open circuits and sudden limp mode.
- P0841, P0846, P0870: Transmission fluid pressure sensor and pressure switch circuit rationality faults.
Diagnostic Steps Before 62TE Shift Solenoid Replacement
Before ordering a replacement assembly, grab a digital multimeter to verify whether the electrical circuits inside the transmission case connector are actually out of spec.
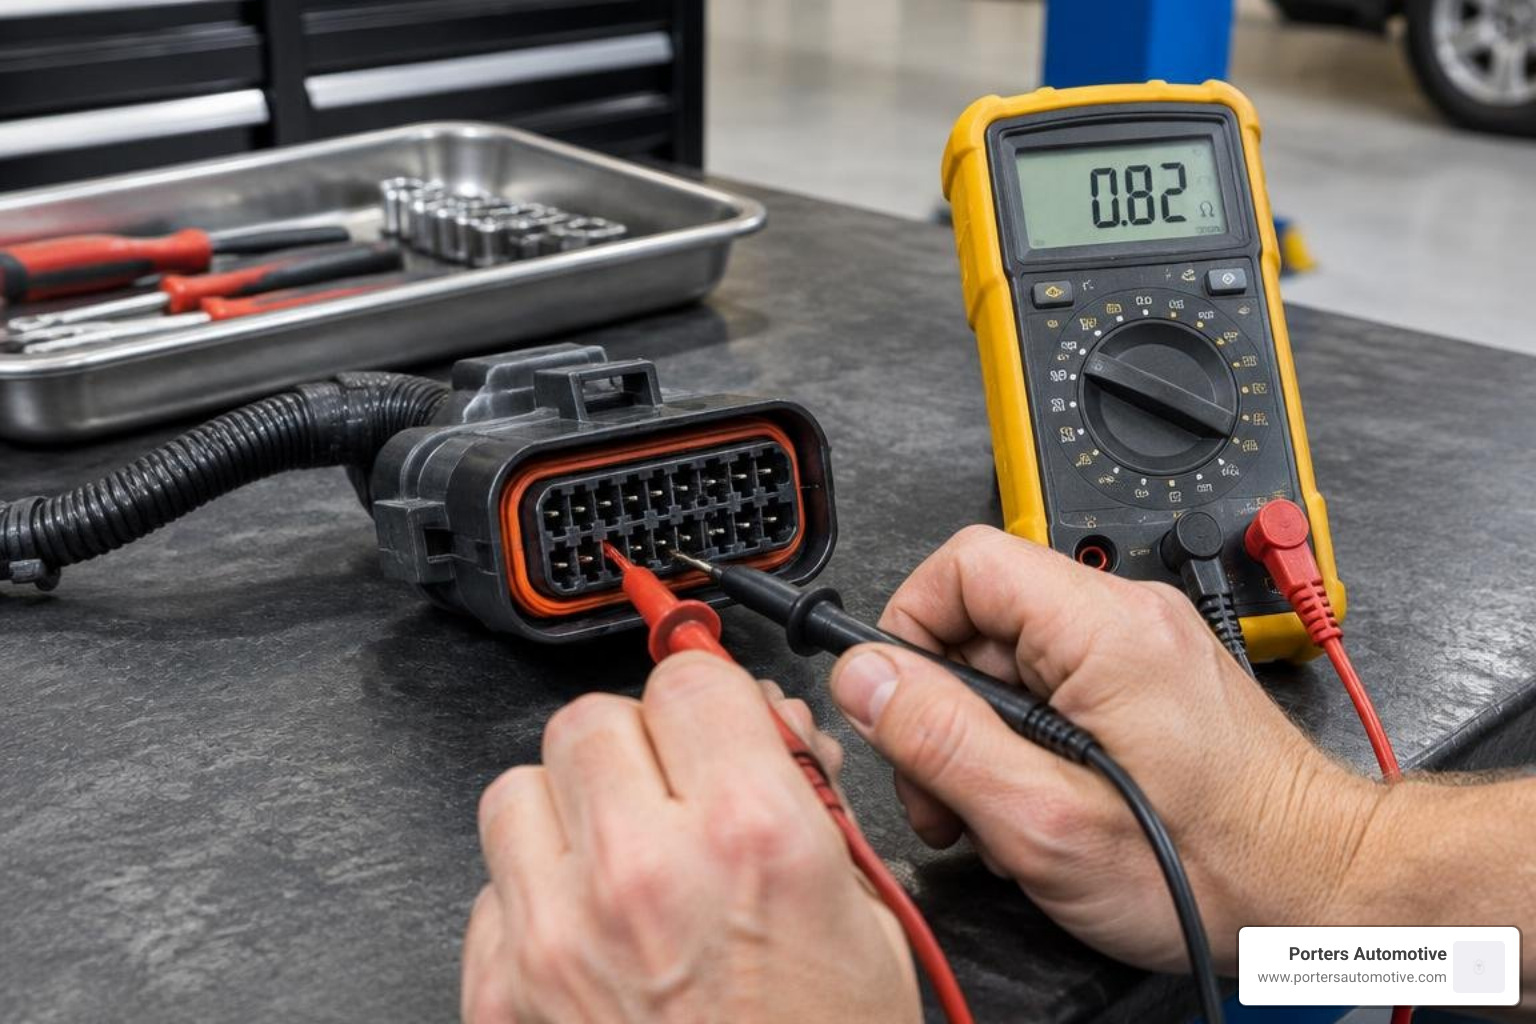
- Disconnect the negative battery cable.
- Unplug the 23-way case connector located on the front of the transmission housing.
- Set your multimeter to low ohms (resistance mode) and zero out your meter leads.
- Use Pin 10 (the common 12-volt fused power feed) as your primary reference lead.
- Probe each solenoid control circuit pin at an ambient temperature of roughly 70°F and compare your readings to factory baselines:
- Shift Solenoids (Pins for Low/Reverse, 2/4, Underdrive, Overdrive, etc.): Should measure approximately 1.8 ohms. A reading above 5.0 ohms or showing "OL" (open loop) indicates a broken internal coil or severe corrosion.
- Line Pressure Solenoid (VLP): Should measure approximately 4.9 ohms.
- Pressure Switch Resistors: Should measure approximately 300 ohms.
If a circuit reads significantly higher or shows infinite resistance directly at the transmission case pin, the solenoid coil or internal ribbon trace is defective.
Solenoid Architecture: Normally Open vs. Normally Closed
The 62TE solenoid block is an electro-hydraulic assembly. Packed inside its composite housing are:
- Six individual shift solenoids
- One variable line pressure (VLP) solenoid
- Five integrated pressure switches
- One transmission fluid temperature sensor
Understanding how these solenoids rest is critical for diagnosis. The six shift solenoids are divided into two operational designs:
- Normally Open Solenoids: The Underdrive (UD) and 2/4 shift solenoids are designed to pass hydraulic fluid when no electrical power is applied. This deliberate engineering choice allows fluid to reach clutch circuits during complete electrical failure, locking the transmission safely into 3rd gear limp mode so you aren't stranded in neutral.
- Normally Closed Solenoids: The remaining four shift solenoids block fluid flow until the computer energizes their coils.
If you ever bench-test solenoids using low-pressure compressed air (under 20 psi), blowing air into the inlet will pass through the body ports on normally open solenoids, while normally closed units will block airflow entirely until energized.
Common Faults Mistaken for a Bad Solenoid Pack
Not every shifting glitch originates inside the solenoid pack. Before teardown, rule out these common red herrings:
- Low Battery Voltage or Bad Grounds: The TCM requires clean 12-volt power. A weak battery or corroded ground strap can cause false voltage drop codes and trigger limp mode.
- Corroded C101 Main Harness Connector: Moisture intrusion into the engine-to-transmission harness pins can mimic open solenoid circuits.
- Restricted Fluid Filter: Low-grade or collapsed aftermarket filters can starve the internal pump, dropping line pressure below the threshold required to actuate shift valves.
- Missing or Stuck Check Balls: During valve body service, if a tiny check ball is dropped or mislocated, fluid redirects improperly, causing severe gear ratio codes (such as P0732).
- Torque Converter Clutch (TCC) / EMCC Failure: A worn converter friction lining or stuck EMCC control valve will set P0740, which cannot be permanently cured by a solenoid pack swap alone.
Step-by-Step 62TE Shift Solenoid Replacement Guide
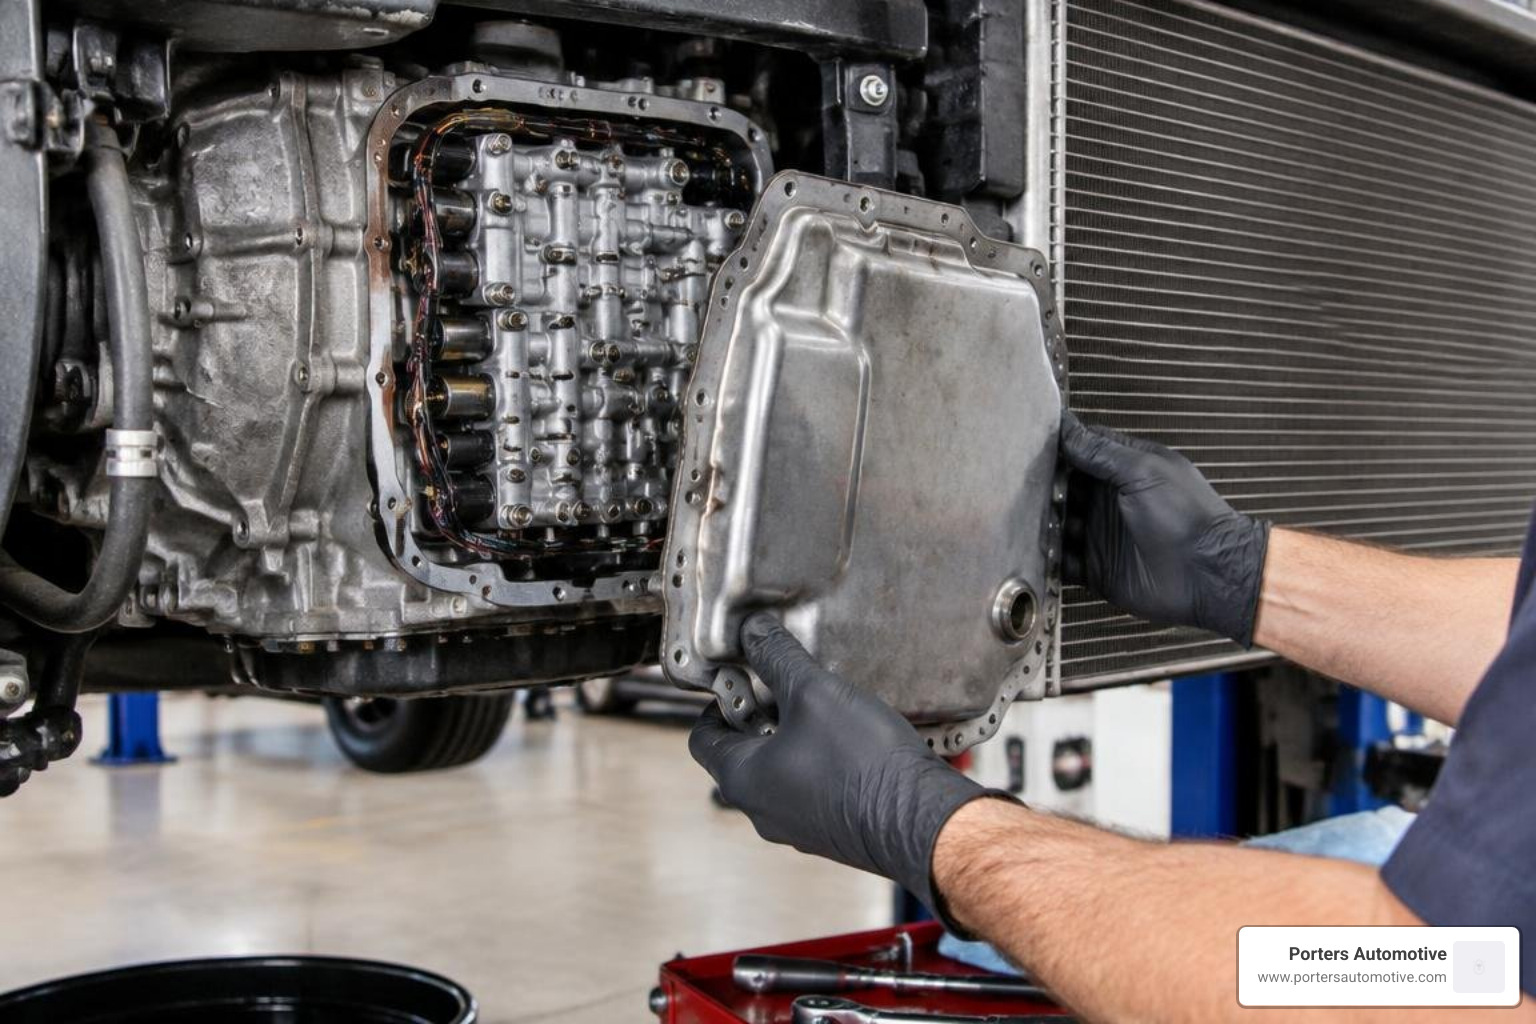
One major advantage of the 62TE transmission is that its valve body and solenoid pack sit behind an external front pan cover facing the radiator area. You can perform a 62te shift solenoid replacement without removing the entire transmission or dropping the structural subframe.
Tools and Parts Required for 62TE Shift Solenoid Replacement
Gather these tools and supplies before cracking open the hydraulics:
- Replacement 62TE Solenoid Pack (OEM Mopar or quality tested aftermarket)
- Replacement solenoid base gasket/screen and new O-rings
- Torx T25 and Torx T20 drivers
- 8mm, 10mm, and 13mm sockets with 1/4-inch and 3/8-inch ratchets
- Precision inch-pound torque wrench (capable of 50 in-lb)
- Foot-pound torque wrench (capable of 9 ft-lb)
- Transmission fluid drain pan and large drop cloth
- Plastic gasket scraper and brake parts cleaner
- Mopar ATF+4 transmission fluid (typically 5 to 7 quarts for pan drain and refill)
- RTV transmission sealant (Mopar ATF-RTV or equivalent)
- 9336A transmission dipstick tool and an OBD-II scan tool capable of Chrysler TCM Quick Learn routines
Solenoid Pack Removal and Installation Procedure
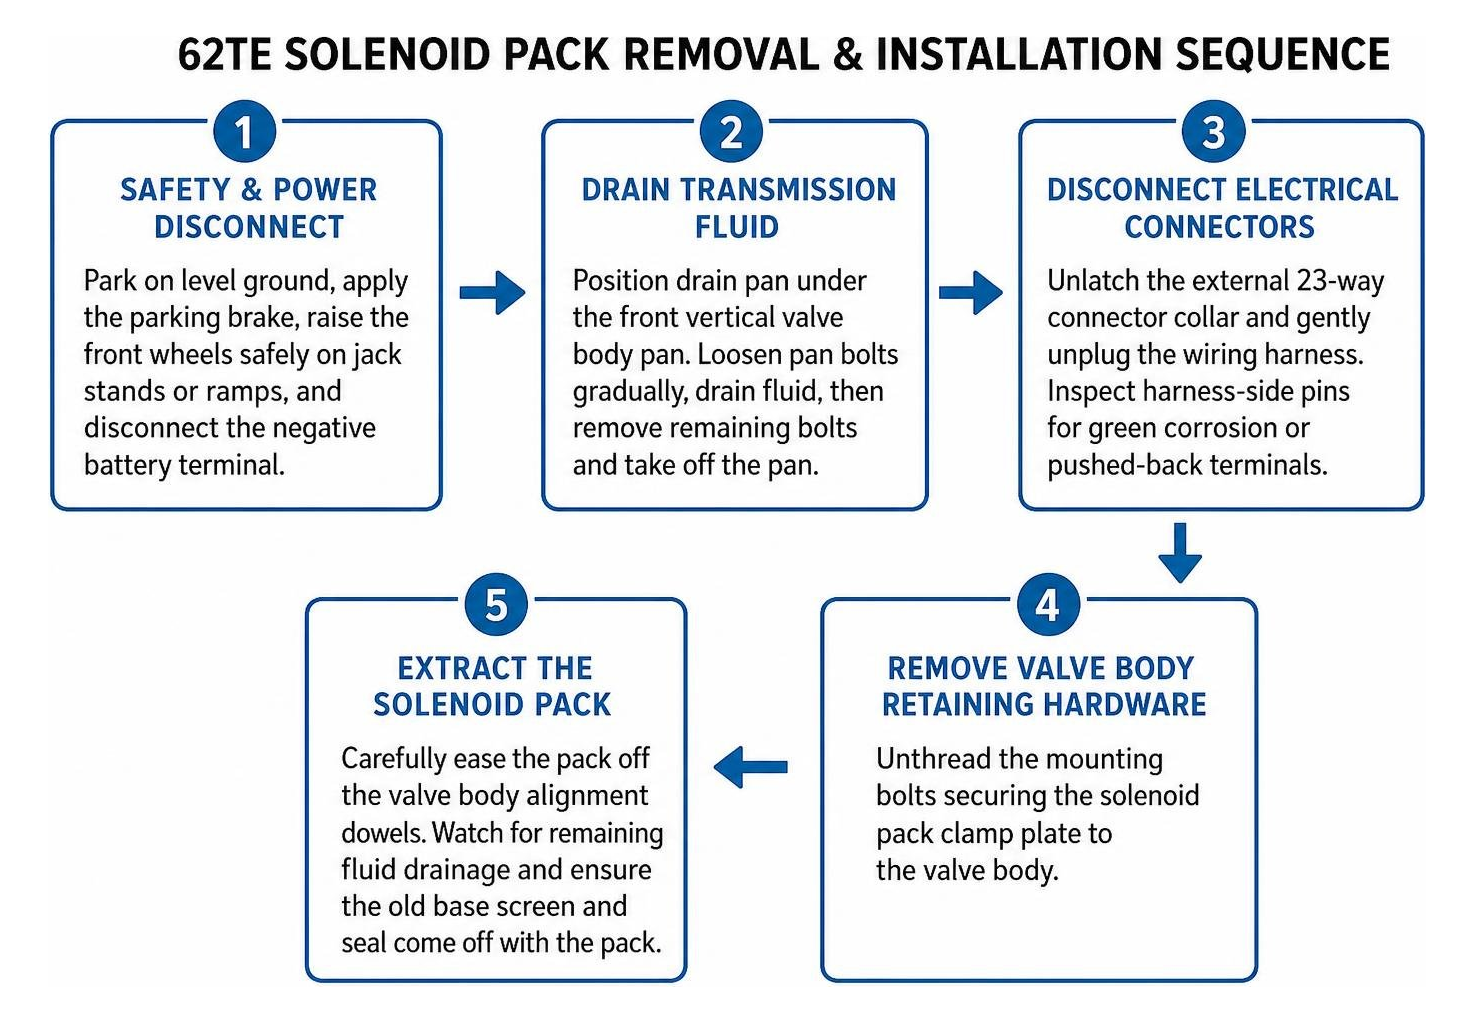
Follow this step-by-step sequence to replace the unit cleanly and safely:
-
Safety and Power Disconnect: Park on level ground, apply the parking brake, raise the front wheels safely on jack stands or ramps, and disconnect the negative battery terminal.
-
Drain Transmission Fluid: Position your drain pan under the front vertical valve body pan. Loosen the pan bolts gradually, allowing fluid to drain out cleanly before completely removing the bolts and taking off the pan.
-
Disconnect Electrical Connectors: Unlatch the external 23-way connector collar and gently unplug the wiring harness. Inspect the harness-side pins for green corrosion or pushed-back terminals.
-
Remove the Valve Body Retaining Hardware: Unthread the mounting bolts securing the solenoid pack clamp plate to the valve body.
-
Extract the Solenoid Pack: Carefully ease the pack off the valve body alignment dowels. Watch for remaining fluid drainage and ensure the old base screen and seal come off with the pack.
-
Clean the Mating Surfaces: Spray the valve body contact surfaces with residue-free solvent. Use a plastic scraper on the pan mating flange to remove old RTV sealant, taking care not to gouge the aluminum.
-
Install the New Solenoid Pack: Position the new base gasket and screen onto the new pack. Slide the assembly over the alignment dowels on the valve body.
-
Torque the Retaining Fasteners: Install the clamp plate bolts hand-tight. Using an inch-pound torque wrench, tighten the solenoid pack bolts evenly to 6 N·m (50 in-lb). Never overtighten these small fasteners, as overtorquing will distort the internal valve bores.
-
Reinstall the Pan: Apply a consistent bead of ATF-rated RTV silicone to the clean valve body pan flange. Align the pan and torque the pan bolts in a crisscross pattern to 12 N·m (9 ft-lb or 108 in-lb). Allow the sealant to cure according to manufacturer instructions.
-
Reconnect Wiring and Battery: Plug the 23-way case connector in firmly until the locking collar snaps securely into place. Reconnect the negative battery terminal.
Post-Installation ATF+4 Fluid Refill and TCM Quick-Learn
Once mechanical assembly is complete, fluid management and electronic calibration ensure long-term reliability:
- Refill with Licensed ATF+4: Pour 5 quarts of licensed Mopar ATF+4 fluid through the transmission fill tube.
- Initial Fluid Check: Start the engine, keep your foot on the brake, and cycle the shift lever through Park, Reverse, Neutral, and Drive, pausing 5 seconds in each position before returning to Park.
- Measure Depth with Tool 9336A: Insert the 9336A dipstick tool until it contacts the pan floor. Use a scan tool to monitor transmission fluid temperature and cross-reference the fluid height in millimeters against the factory temperature-to-depth chart.
- Execute the TCM Quick Learn: Connect your bidirectional diagnostic scan tool to the OBD-II port. Navigate to the transmission control module menu and select Quick Learn Routine. Ensure the transmission temperature is within the required operating window (typically between 80°F and 120°F). Follow the tool's on-screen prompts while holding the service brake. The computer will pulse each clutch circuit, measuring fill volume and clutch clearance to adapt to your new solenoid tolerances.
- Road Test: Drive the vehicle through light-throttle upshifts from 1st through 6th gear, verifying seamless engagement.
Solenoid Pack Rebuild vs. Full Assembly Replacement
When faced with a malfunctioning pack, you have two primary repair avenues: install a brand-new complete assembly or rebuild your existing unit.
| Feature / Metric | Complete New OEM/Aftermarket Pack | Rebuilding with 545RFE Repair Kit |
|---|---|---|
| Typical Part Cost | $200 – $450 | $35 – $75 |
| Labor Time Required | 1.5 to 2.5 hours | 2.5 to 4.0 hours |
| Difficulty Level | Moderate DIY | Advanced DIY / Bench Assembly |
| Component Coverage | Replaces all 7 solenoids, switches, sensors, and housing | Replaces screen, internal O-rings, and pressure switch diaphragms only |
| Risk of Repeat Failure | Low (fresh coil windings and circuitry) | Moderate (older solenoid electrical coils remain in service) |
| Recommended Scenario | Vehicles over 120,000 miles or with burned electrical coils | Low-mileage units with minor pressure switch tears or debris contamination |
Rebuilding the pack involves disassembling the composite top plate with T20/T25 Torx bits, cleaning the valve passages, and replacing the rubber pressure switch diaphragms and sealing rings (many of which cross-reference with standard 545RFE solenoid rebuild kits).
Crucial Assembly Rule: Never use transmission assembly gel or heavy petroleum grease on 62TE pressure switch diaphragms. Thick grease can plug the micro-orifices, blinding the pressure switches and immediately triggering DTC P0841. Use only clean ATF+4 to lubricate seals during reassembly.
Repair Costs, Shop Labor, and Mistakes to Avoid
Understanding realistic repair expenses helps you weigh the DIY route against professional shop service:
- OEM Mopar Solenoid Pack: $300 to $450
- Quality Tested Aftermarket Pack: $200 to $320
- Fluid, Gaskets, and Sealant: $45 to $75
- Professional Shop Labor: $150 to $350 (typically 1.5 to 3.0 book hours including fluid leveling and computer relearn)
- Total Shop Repair Cost: $400 to $750+
By tackling the job in your driveway, you can complete the repair for roughly $250 to $400 in total materials.
To ensure your repair goes smoothly on the first try, avoid these common mistakes:
- Using Generic Multi-Vehicle ATF: The 62TE relies strictly on the friction profile of ATF+4. Universal fluids can cause severe clutch shudder and friction lining degradation in fewer than 20,000 miles.
- Overtorquing Clamp Bolts: Torque wrenches calibrated in foot-pounds are too coarse for small fasteners. Always use an inch-pound wrench set strictly to 50 in-lb for the internal clamp plate.
- Skipping the Quick Learn Routine: Installing new solenoids without resetting the TCM's adaptive memory forces the computer to apply outdated pressure curves, which can lead to harsh shifts and premature clutch wear.
- Terminal Pin Contamination: The 62TE connector utilizes gold-plated pins for sensitive low-voltage pressure switch circuits and tin pins for heavy solenoid power leads. Keep these connections clean and free of dielectric grease contamination inside the terminal sockets.
Frequently Asked Questions about 62TE Solenoid Repair
Can I drive my vehicle while it is in 62TE limp mode?
You should only drive in limp mode for very short distances at low speeds to reach a safe location or repair facility. Limp mode locks the transmission into a single ratio (usually 3rd gear), which forces the torque converter to slip heavily during takeoff from a standstill. This produces rapid heat buildup and accelerates clutch wear.
Why does the 62TE transmission require only ATF+4 fluid?
ATF+4 is a synthetic baseline fluid formulated with specific shear-stable viscosity index improvers and friction modifiers tailored specifically for Chrysler clutch friction materials and electronically modulated converter clutches (EMCC). Generic or multi-vehicle fluids lack these calibrated friction properties, leading to clutch slippage and harsh shifts.
Do I need to remove the whole transmission to replace the solenoid pack?
No. The 62TE solenoid assembly and valve body are mounted externally behind a front cover pan. You can easily service the solenoid pack from beneath the vehicle without pulling the transmission or dropping the engine cradle.
Conclusion
A failing transmission solenoid pack can make your vehicle feel ready for the scrapyard, but a systematic approach makes this a manageable weekend repair. By verifying coil resistance with a multimeter, installing a quality replacement pack to exact torque specifications (50 in-lb on clamp bolts, 9 ft-lb on pan bolts), refilling with licensed ATF+4, and executing an electronic Quick Learn, you can restore smooth, factory-level shifting.
If you run into stubborn electrical faults, lack a bidirectional scanner for the relearn routine, or prefer to have seasoned professionals handle your drivetrain service, our team is here to help. Contact Porters Automotive in Tallahassee, FL, Quincy, FL, or Bradfordville, FL for comprehensive transmission diagnostics, maintenance, and precision automotive repairs.